4.1.2022 – 4.12.2022
This year I took over the boil and it was a data driven season. I began work in July 2021 when I designed and ordered parts for a home-built reverse osmosis sap concentration system (RO). The design was based heavily off of the work Dan Roseum did to make his RO. Check it out on his website – his diagrams explain the layout of components nicely. From this starting point I learned about the recirculation valve and incorporated it into my design – this little valve loops a portion of the concentrated sap back through the system to further concentrate it. My boil rate was too fast this year for me to take full advantage of the recirculate, but next year it will come into play when I upgrade from 3 membranes to five membranes.
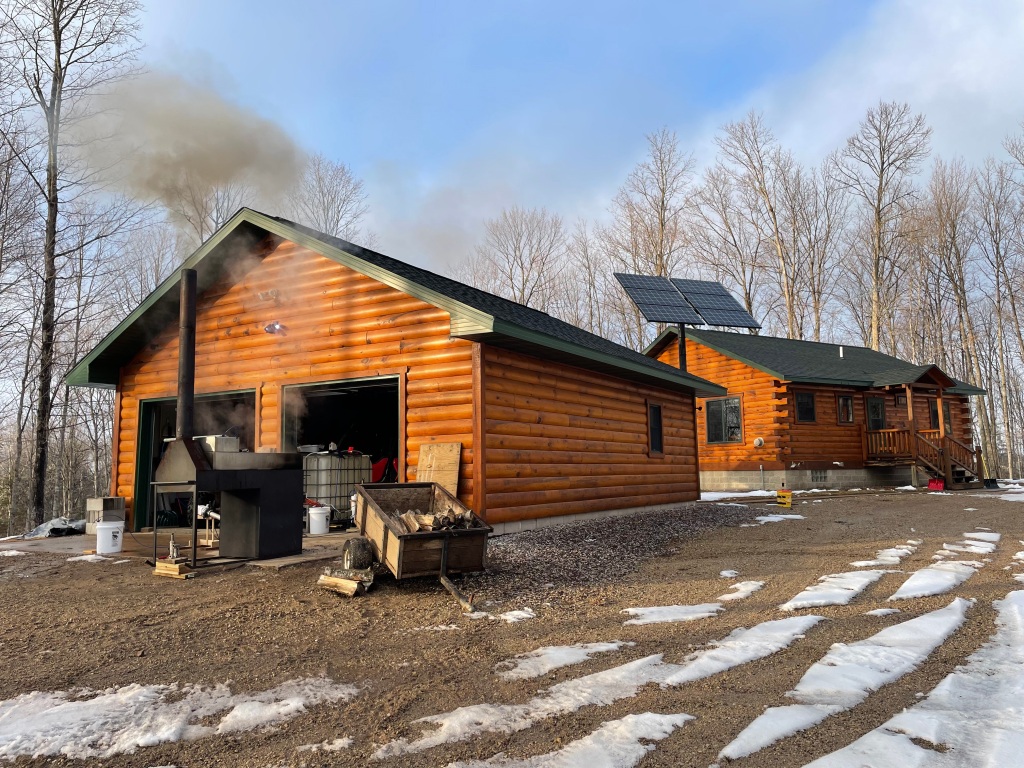
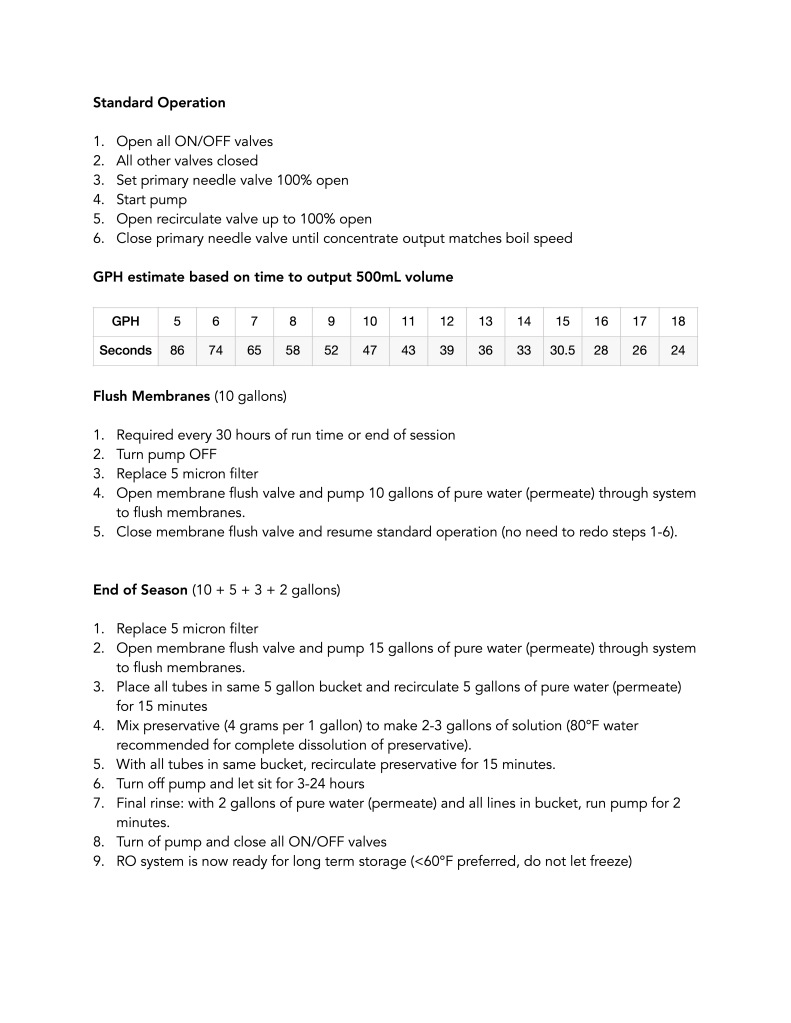
RO is basically a membrane and a pressure pump. Water is a small molecule that can pass through a membrane with a bit of encouragement (high pressure). Sugar is a large molecule that does not pass through the membrane. Most of the sugars get washed off the membrane and into the preheater pan of the cooker, but after some of the sugar molecules load up on the membrane, the flow slows down. Then the RO needs to be flushed with water to wash the clogged membrane. A flush is usually 15-20 minutes.
I ran a test early in the development. A lot of things went wrong. I had leaks everywhere. Turns out pipe dope doesn’t cut it on these tiny high pressure plastic fittings. I redid everything with teflon tape and pressure checked to 150 PSI. This time everything worked perfectly. Lesson learned.
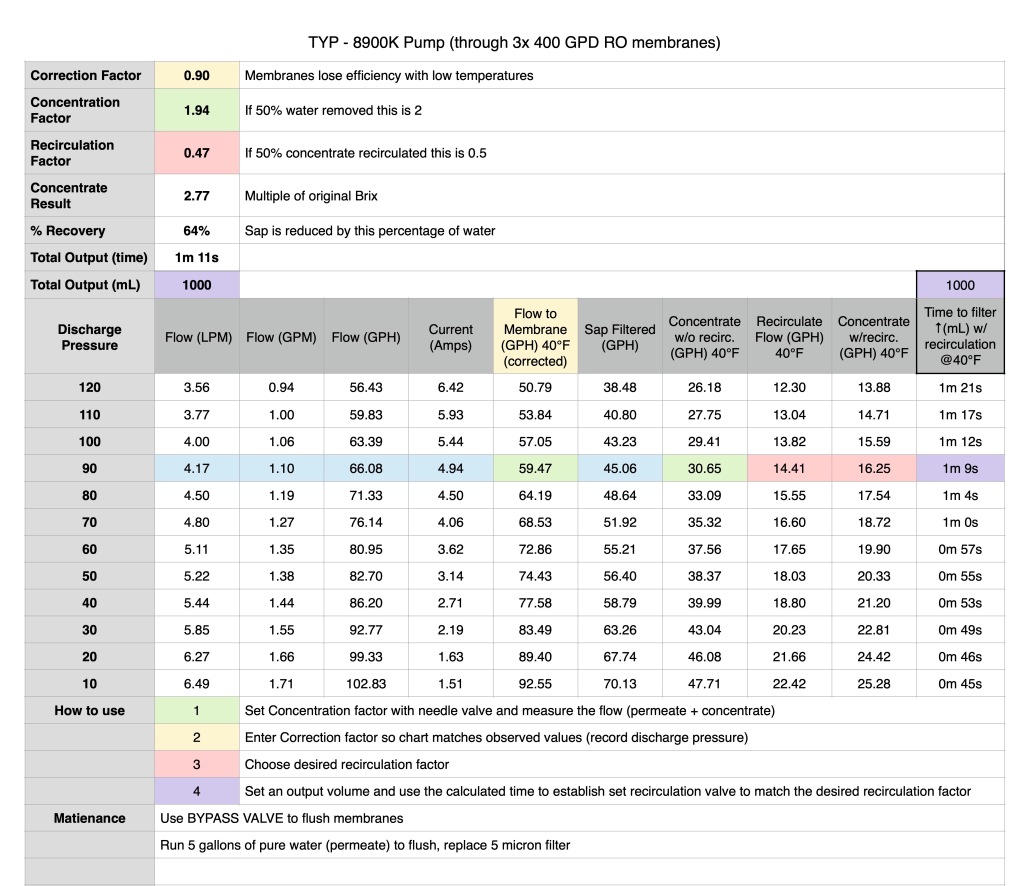
Next I spent a lot of time with a spreadsheet and worked on the math side of things. This is the data from running room temperature water through the RO, and it looked very promising.
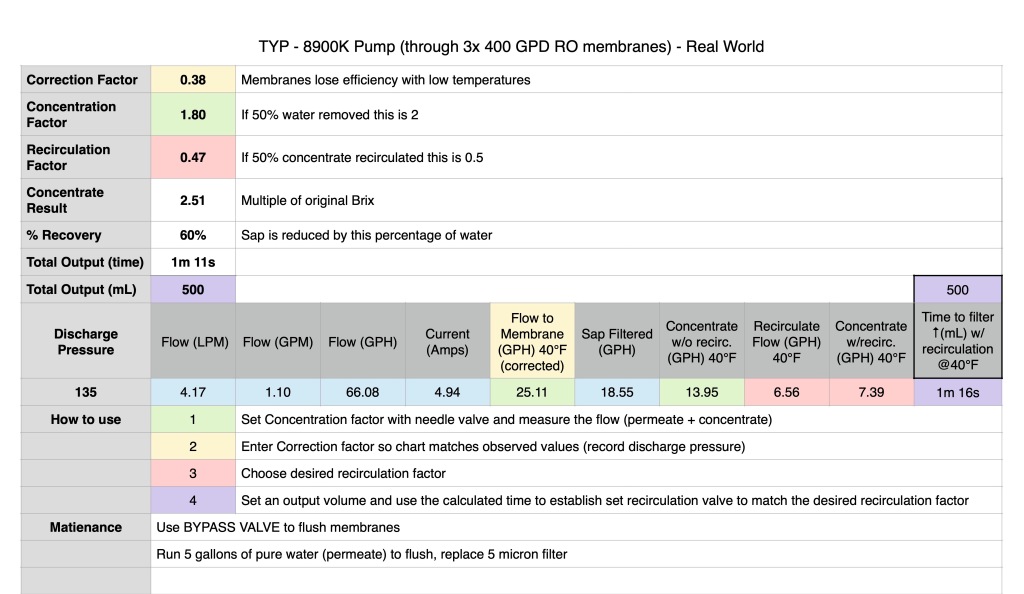
Skip ahead to the end of season and my real world numbers were quite a bit different. Output was about 42% that of my room temperature water test and pressure was running about 45 PSI higher. I redid the spreadsheet with actual numbers from processing cold sap
Here is the video where I am optimistic that the RO will work like a champ… but unsure just how well things will go with cold sap.
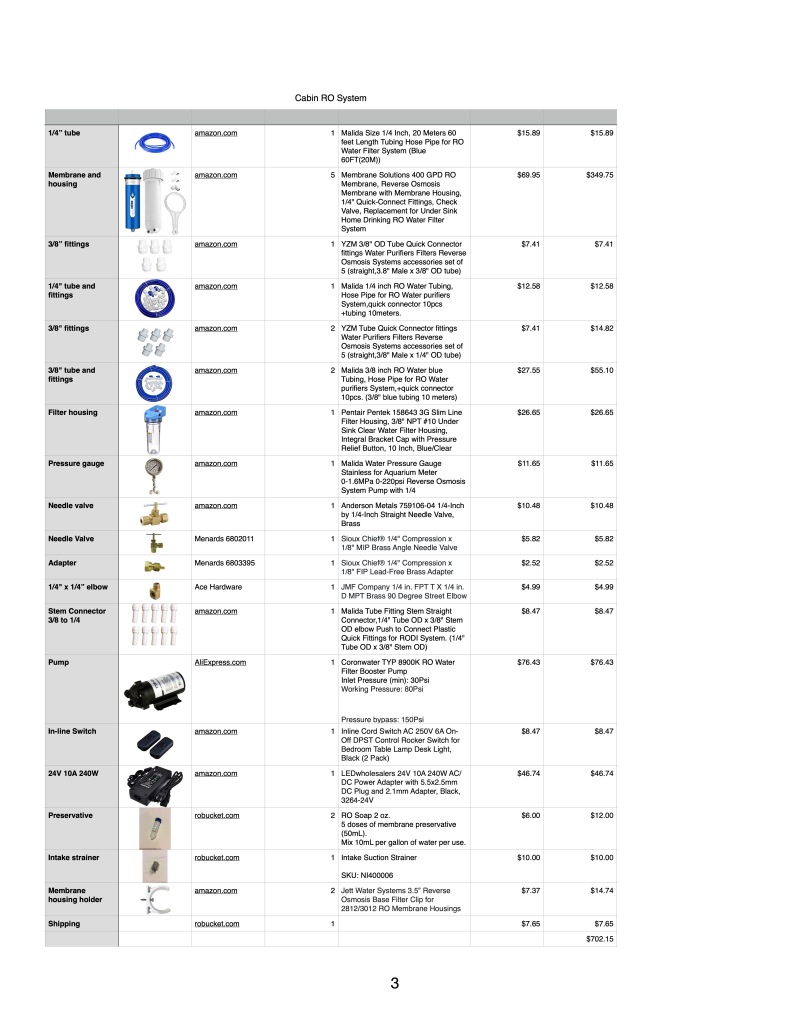
With regards to the RO system I built I also have a complete parts list. Keep in mind I’m not including a few random fasteners (nuts and bolts) or the wood used. Keep reading to the very end of this post to see what updates are being done to the RO for next season. This parts list is complete and includes all the updated parts in the current to-this-day RO setup (the 2023 model).
I think I spent 20 hours on the initial research, development, and testing of the RO. If I traded my time for money this would be a very costly project, but I enjoy learning and see my 20 hours as an investment in understanding a new topic that I had no previous knowledge of before – and that is really exciting!
Maple Syrup 2022 – Batch #1
The Ol’man placed taps on March 18, 2022 and it was a slow start. We were originally delayed by an ice storm on our original tapping date March 11, 2022. Ultimately, it made no difference since the sap didn’t start running until after the taps were placed anyway.
The first collection ran from march 18 to March 31 and saw 285 gallons collected for the boil. I arrived after work on April 1, 2022 and set up, filling my pans with concentrate from the RO and setting my alarm for an early start. The following day I boiled all day, encountered a hardware problem, and limped to the finish line of batch #1on the morning of April 3, 2022.
The stats below reflect the summary of nearly 200 lines of data collected over the course of the boil… I was by myself for quite a while. I needed something to do. Pump 1 is the high output TYP 8900K model that I burned up the transformer for (7A pump with a 5A transformer). Pump 2 is the smaller Aquatech 8800 I originally purchased and kept for a spare. The final Brix is also the last reading, the boil continued for 2-4 minutes after and at the rate it was progressing should have put the finished syrup at 59°Bx at 210°F for pour off.
| Boil time | 18h |
| Wood used | 1 face cord |
| Gallons sap | 285 gal |
| Gallons Syrup | 6 gal |
| Brix sap (hygrometer) | 2.15% |
| Brix sap (actual) | 2.1% |
| RO run time pump 1 | 12h |
| RO permeate p1 GPH | 7.95 |
| RO water removed p1 (gal) | 95.44 |
| RO run time pump 2 | 8h 13m 48s |
| RO permeate p2 GPH | 5.49 |
| RO water removed p2 (gal) | 45.14 |
| Total RO water removed (gal) | 140.59 |
| Water removed from boil (gal) | 138.41 |
| Brix final (@ 218°F) | 57 |
| Boil rate (GPH) | 7.69 |
| Taps | 107 |
| Sap Collection Days | 13 |
The tricky part was knowing when to quench the fire and pull off the syrup. It basically just comes down to knowing the equipment – and that is where data collection proves its value. I was able to watch how fast the Brix was increasing over time and carefully watch my rate of boil to hit just the right timing.
Sarah and I were pouring off the finished syrup just as my folks arrived for the day. After the snow from the day before, it was nice to see some sun and relax a bit. But before heading out, the Ol’man and I collected more, and we started storing up sap for the next boil.
Maple Syrup 2022 – Batch #2
I returned on April 10, 2022 to the cabin after work. The Ol’man was there and staged some wood and set up the preheater pan. I got right to it, starting a fire and the RO before even thinking about getting supper. The jump start was well worth it. The next day I was able to shut down at sunset and get to bed early (compared to 12:30am the last time on batch #1).
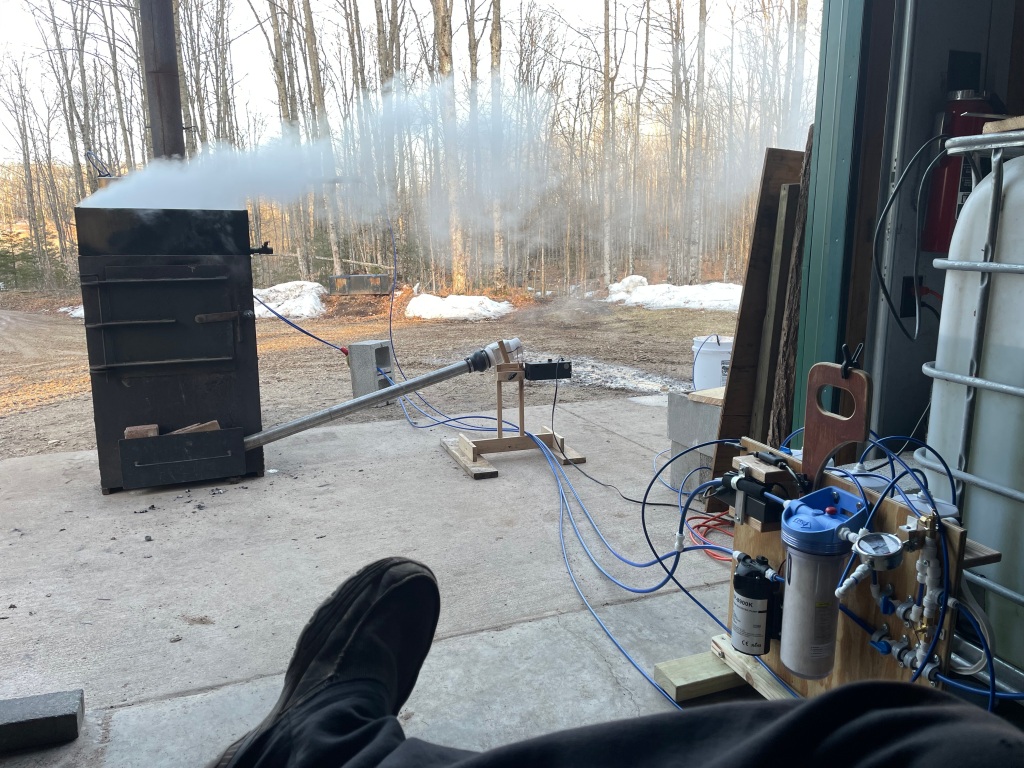

The boil this time around was impressive. I set up an experimental sap preheater and it added 12-14°F to the sap. The RO worked flawlessly with its new 10A transformer. The woodburner was dialed in; the boil was so easy to modulate with the variable speed 12V inline blower fan. During peak efficiency I could move 10 GPH of water with the RO and boil off another 10 GPH while going 50+ minutes between loading the firebox with wood. The boil rate on the final day did slow way down, pulling the average down quite a bit, but the overall boil rate was still one for the record books despite the slowdown during the final 90 minutes of finishing.
| Boil time | 17h 36m 53s |
| Wood used | 0.75 face cord |
| Gallons sap | 335 |
| Gallons Syrup | 9.5 |
| Brix sap (hygrometer) | 3.09 |
| Brix sap (calculated after boil) | 2.47 |
| RO run time pump | 18h 9m 56s |
| RO permeate GPH | 9.72 |
| RO water removed (gal) | 177 |
| RO concentrate GPH | 8.72 |
| RO concentrate produced (gal) | 158.37 |
| Water removed from boil (gal) | 149 |
| Brix final (@ 218°F) | 58.5 |
| Boil rate (GPH) | 8.5 |
| RO preheater | 12-14°F |
| Taps | 107 |
| Collection Days | 10 |
I made another video and without having to worry about the RO performance was able to focus on optimizing the whole system.
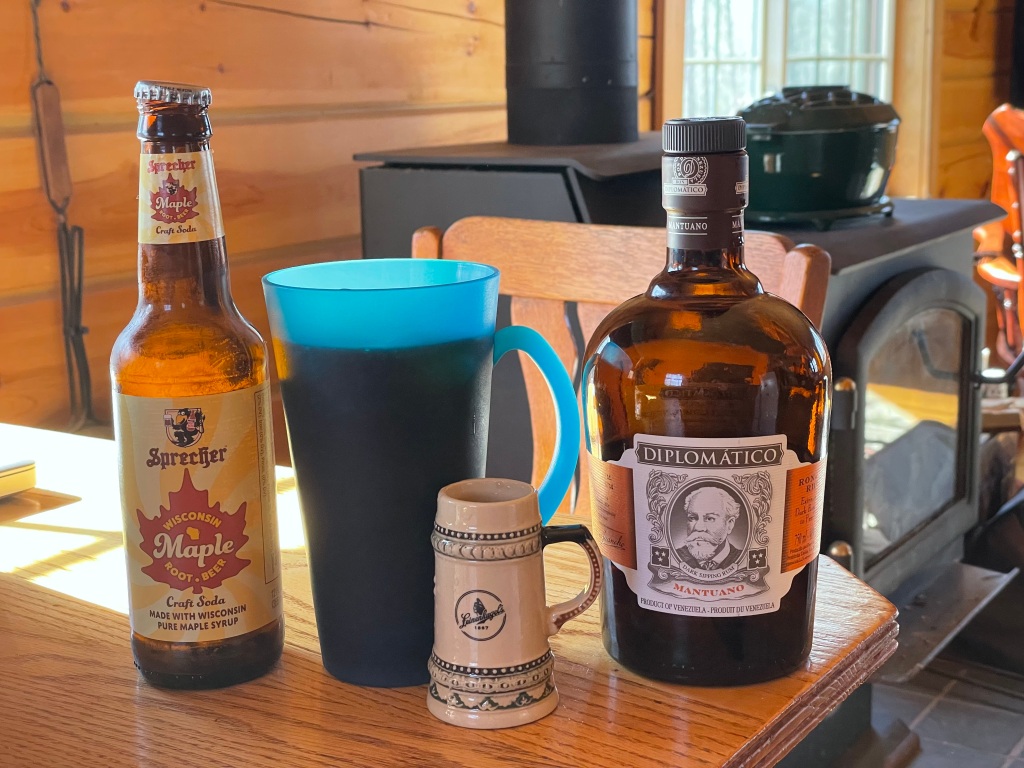
It was great fun! I even celebrated with some maple root beer and rum.
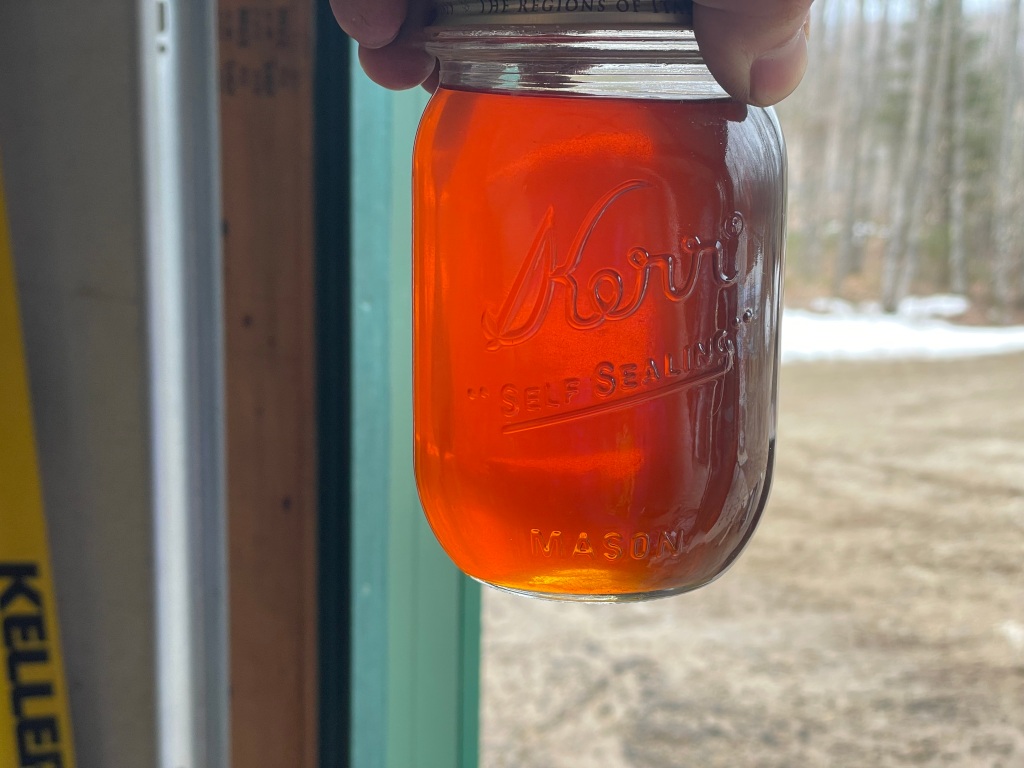
This year’s syrup looks very good. It’s nice and light, whereas previous years it has been darker from the longer, slower, boil.
The Updated RO for 2023
The RO gets a few changes for 2023 (next year). I placed an order for two more membranes and there is a 2 month backorder on them. This is sort of the way things are now – as soon as the idea forms, make a plan, and then place an order so it is on hand when its needed in the future.
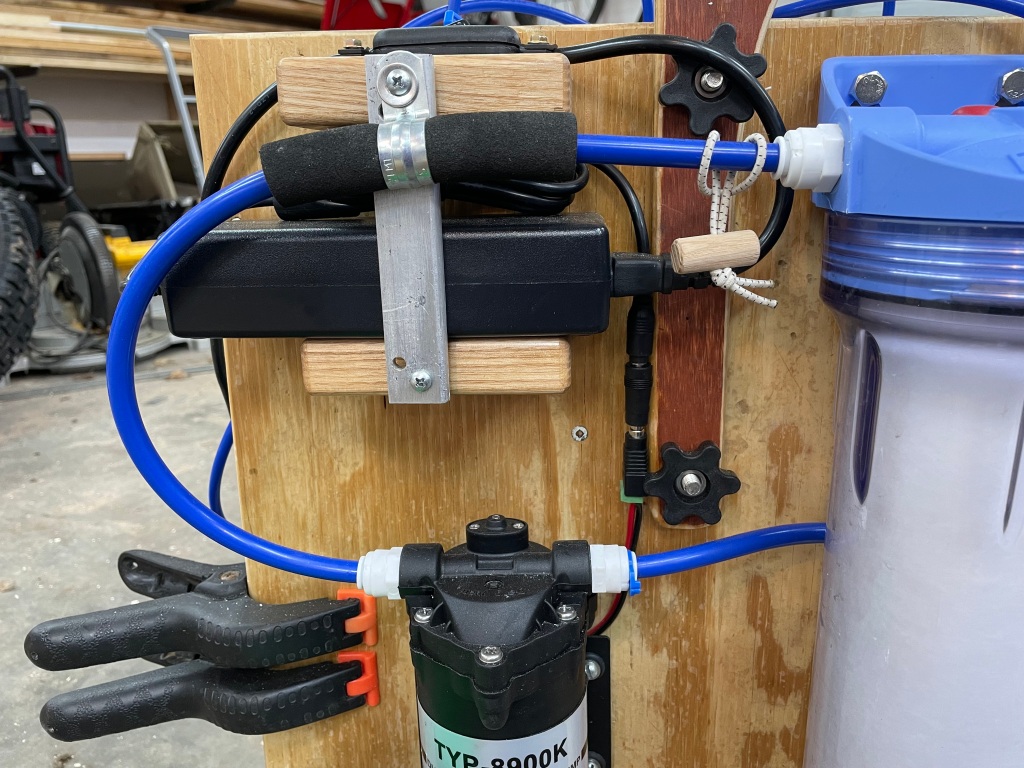
A bunch of little updates happened along the way. Here are some of my favorite ‘little’ touches.
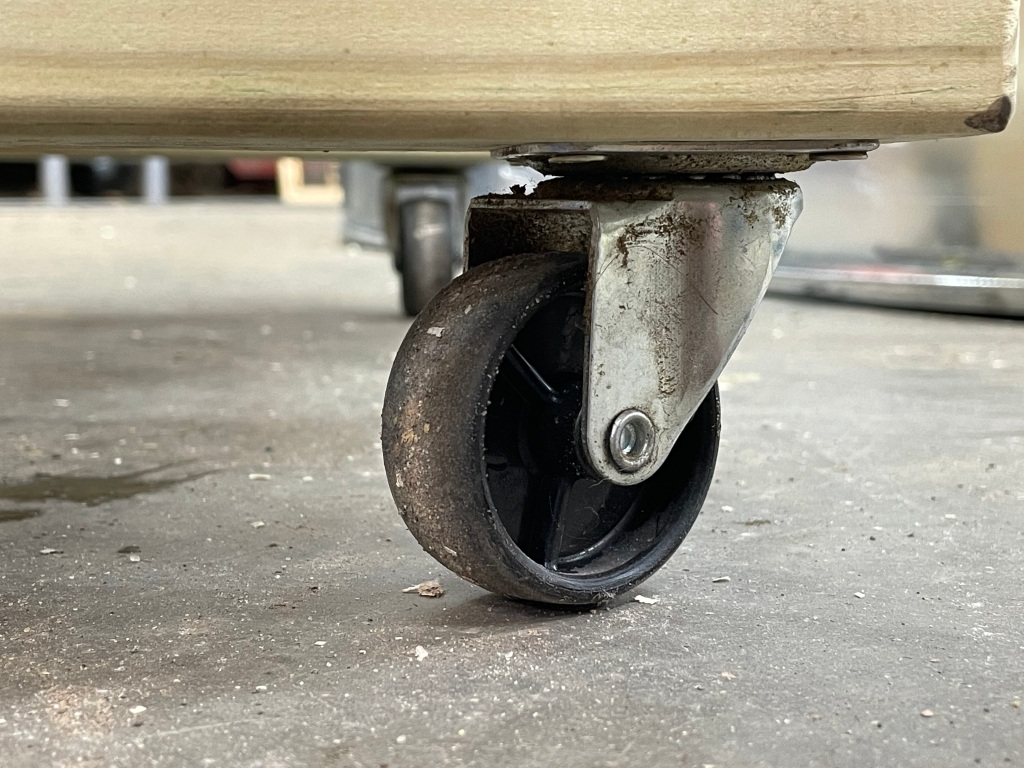
- The device got pretty heavy when full of fluid and adding wheels to the base are a really great little addition. It’s a lot easier to traverse doorways now.
- Tiny cable ties (wood dowel and bungee) keep the lines organized.
- Drilling a hole through a small spring clamp really helps keep things pointed into the correct bucket.
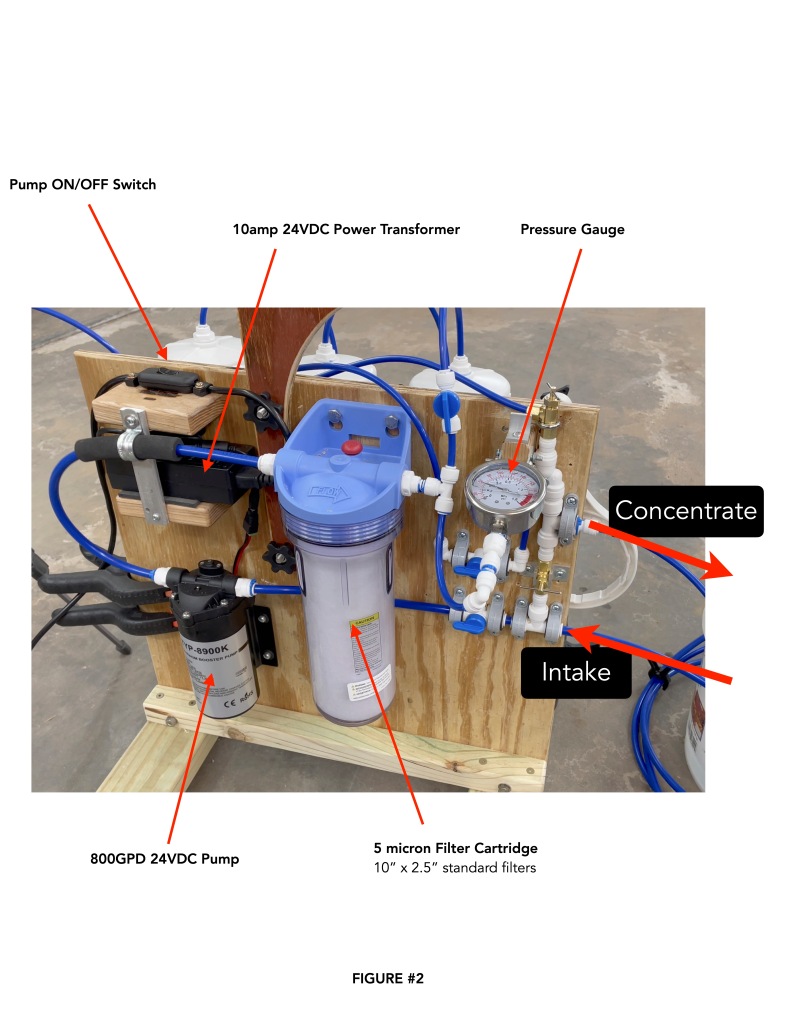
- An inline ON/OFF switch for the power supply cord controls the pump.
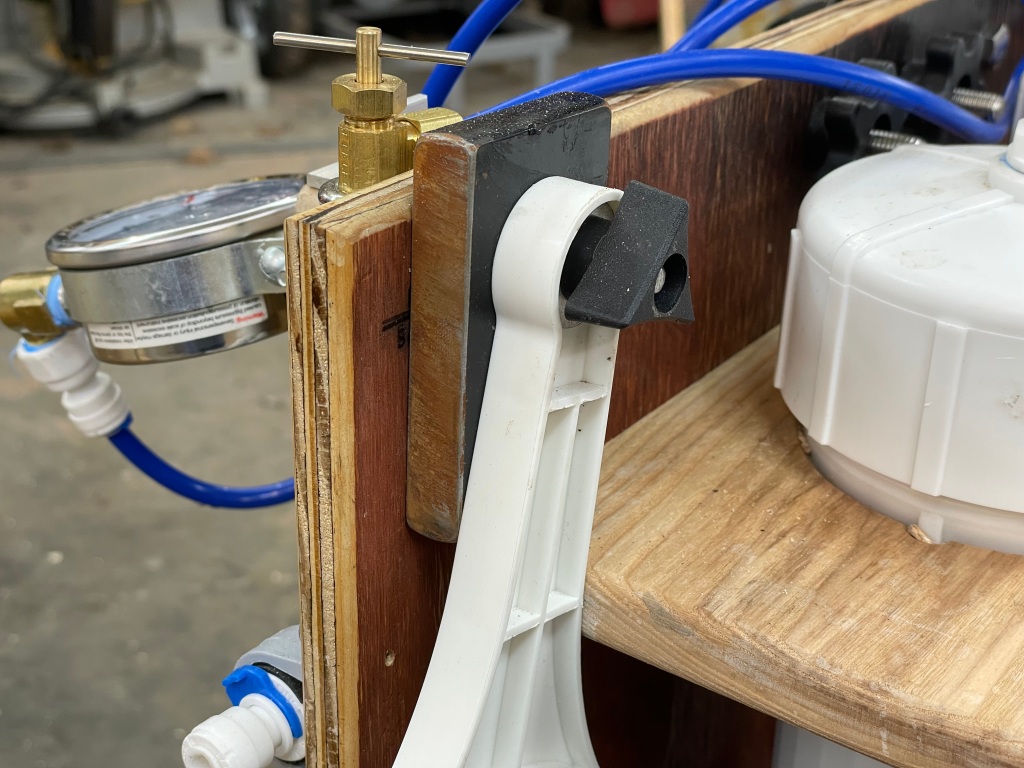
- Tipping the pressure gauge up and placing the needle valve up high makes it easy to adjust the settings without having to crouch or hunker down.
- The handle makes a nice spot to store hoses.
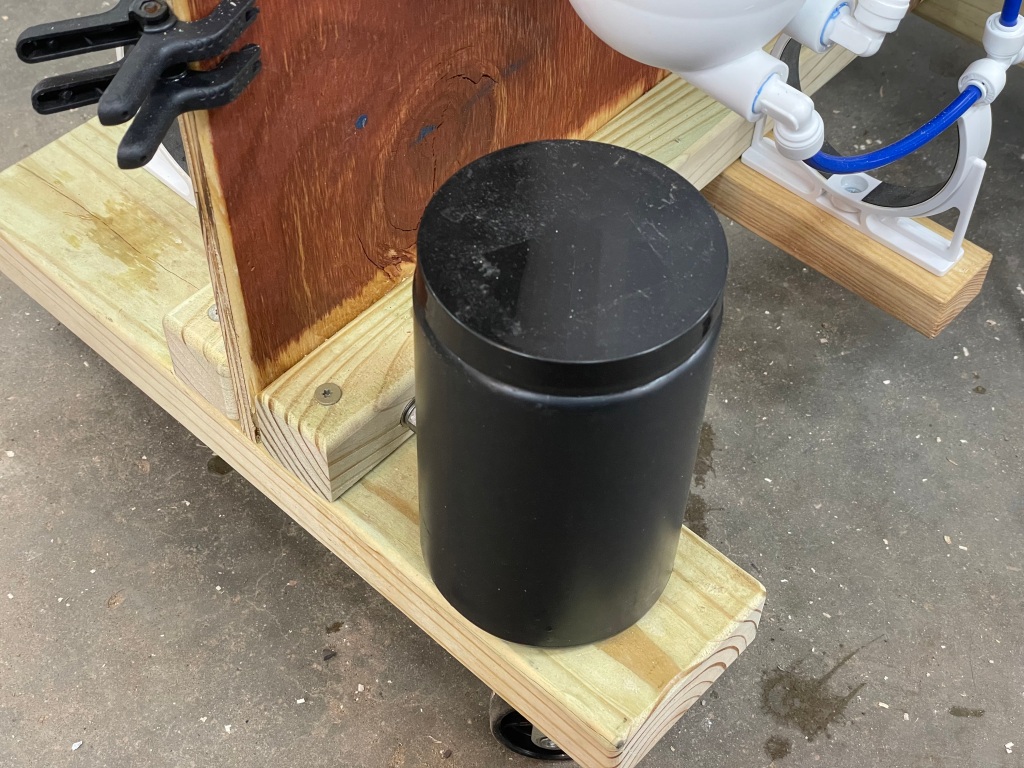
- The black container is built in and keeps the membrane preservative and measuring spoons on board.
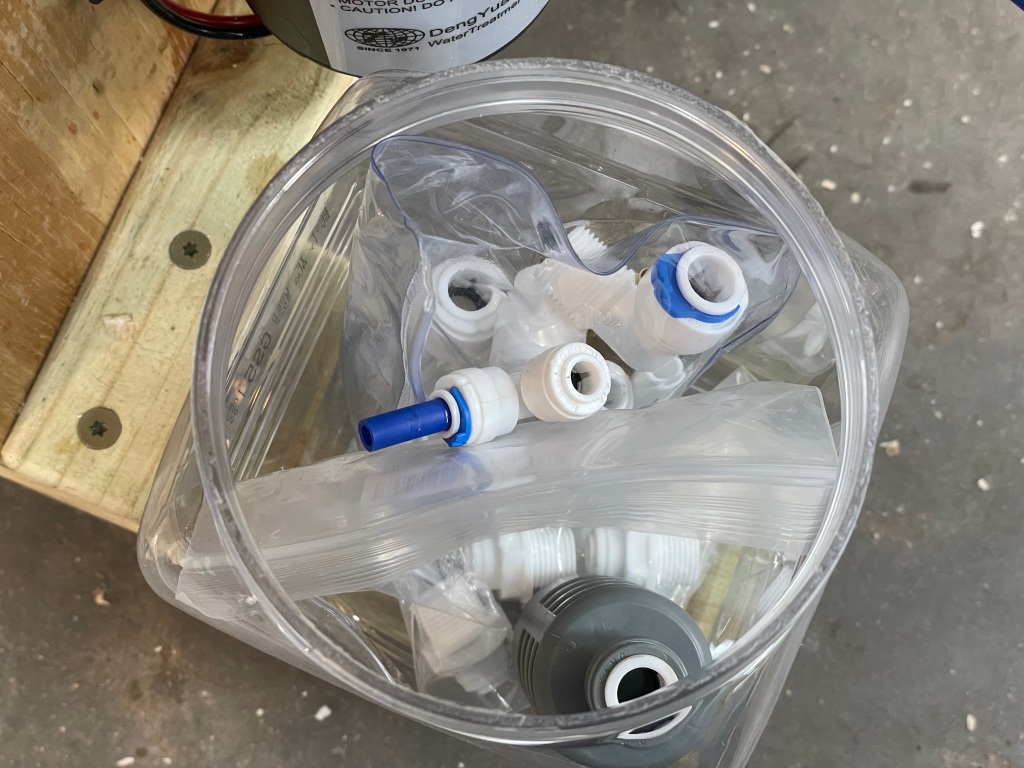
- The clear container stores extra fittings and the intake strainer on board.
- The pump is off to the side with no liquid container vessels above it, just in case of a leak.
- PVC conduit clamps, with a rubber shim, keep the fittings secure and organized.

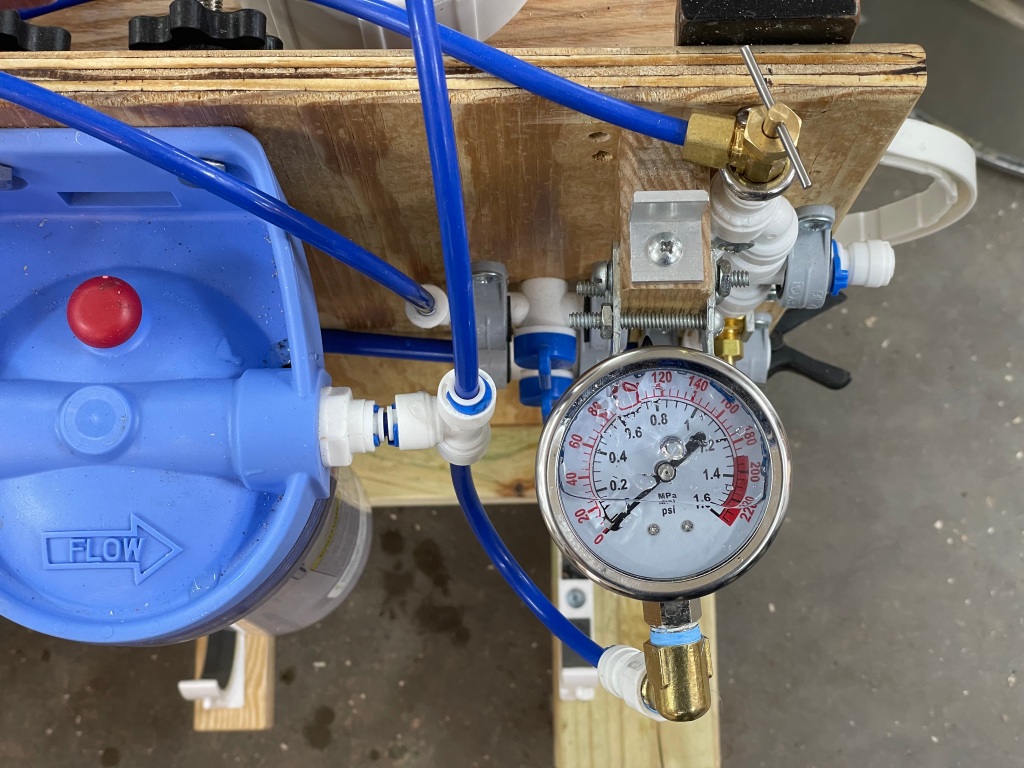
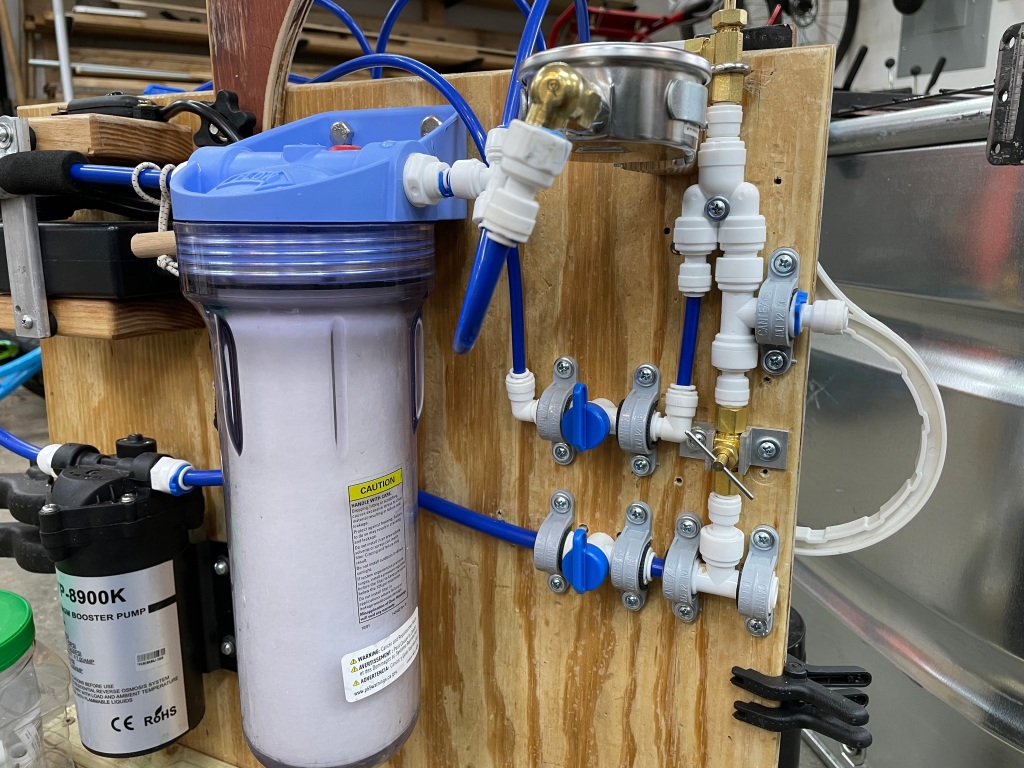
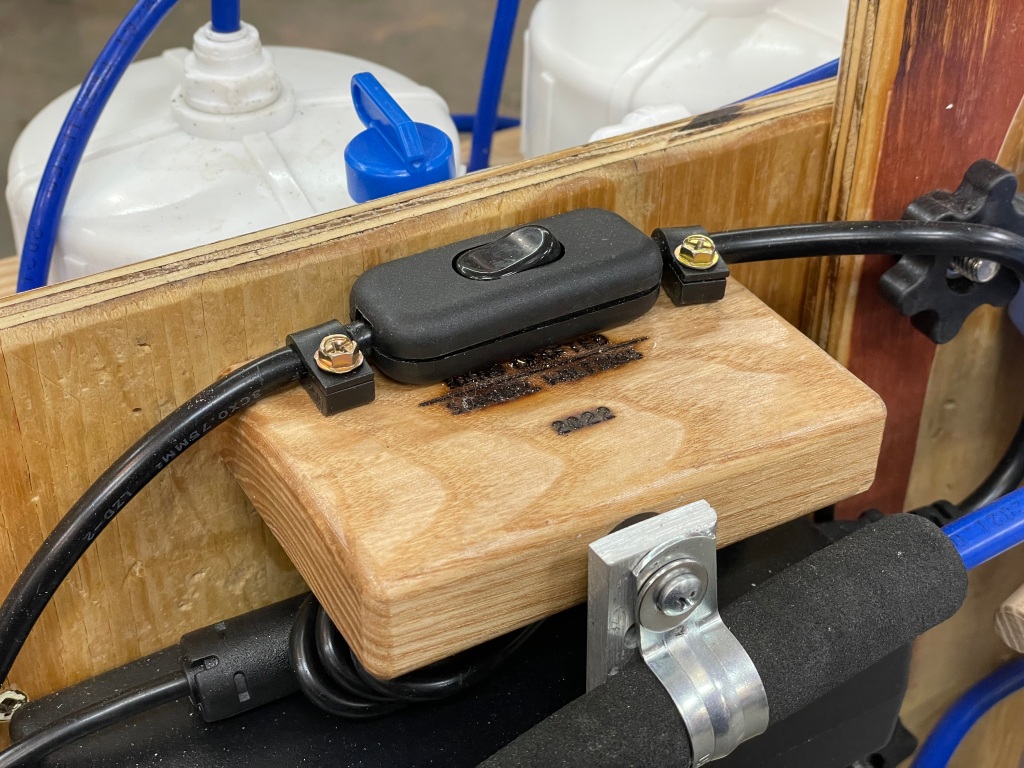
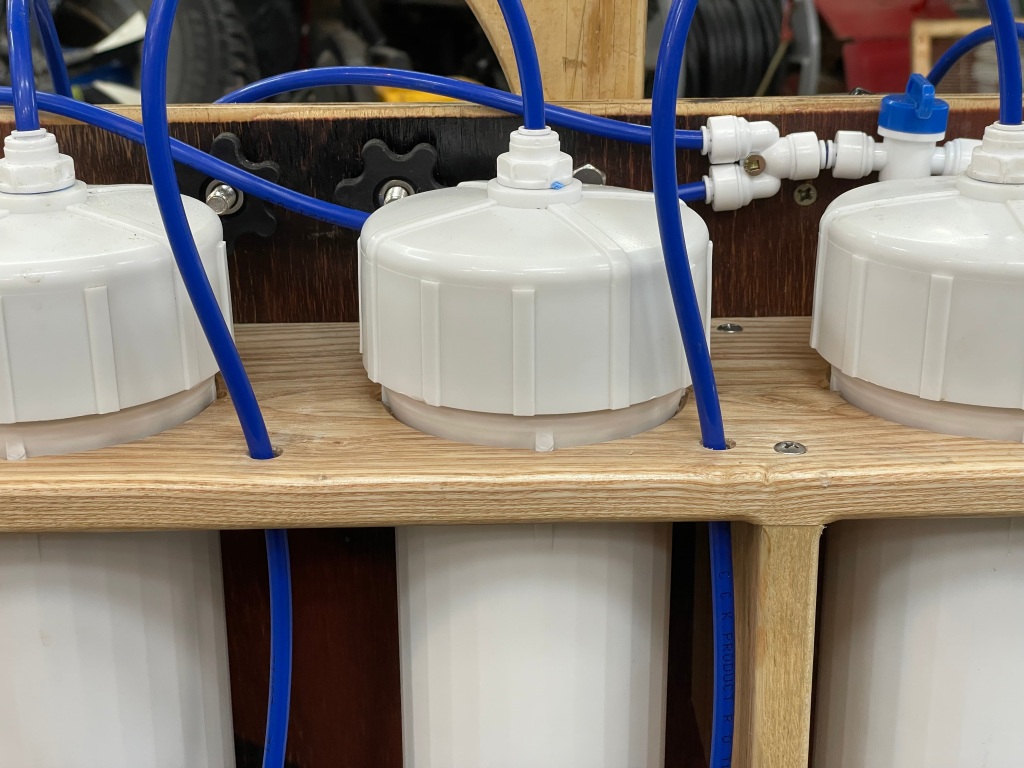

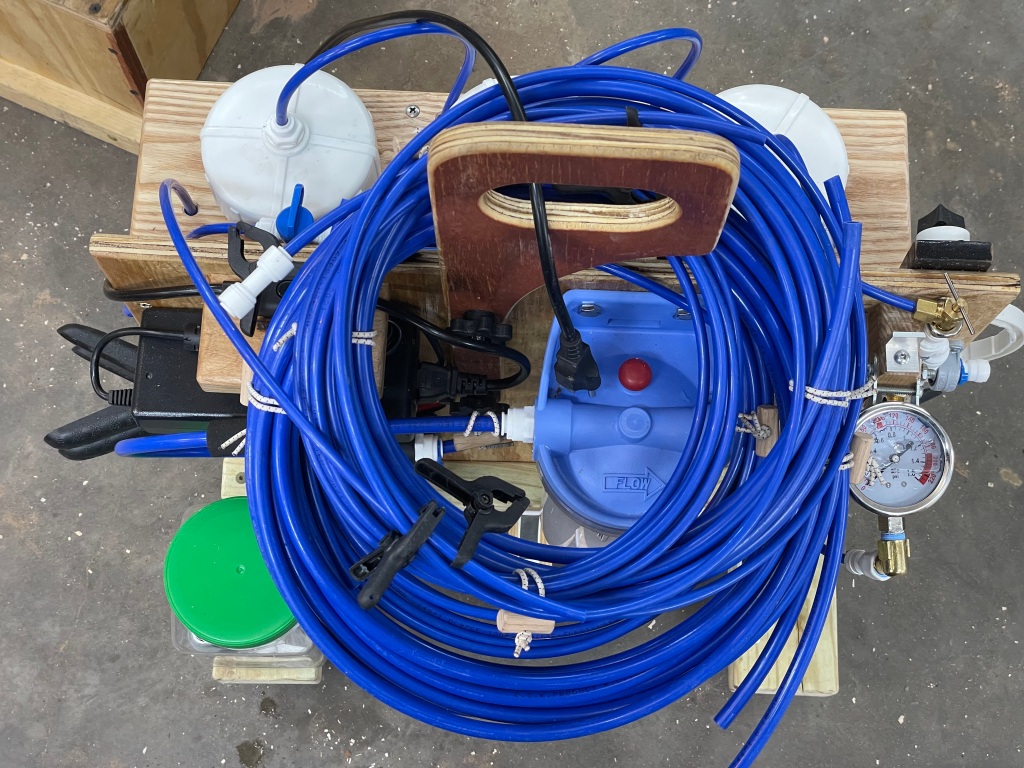
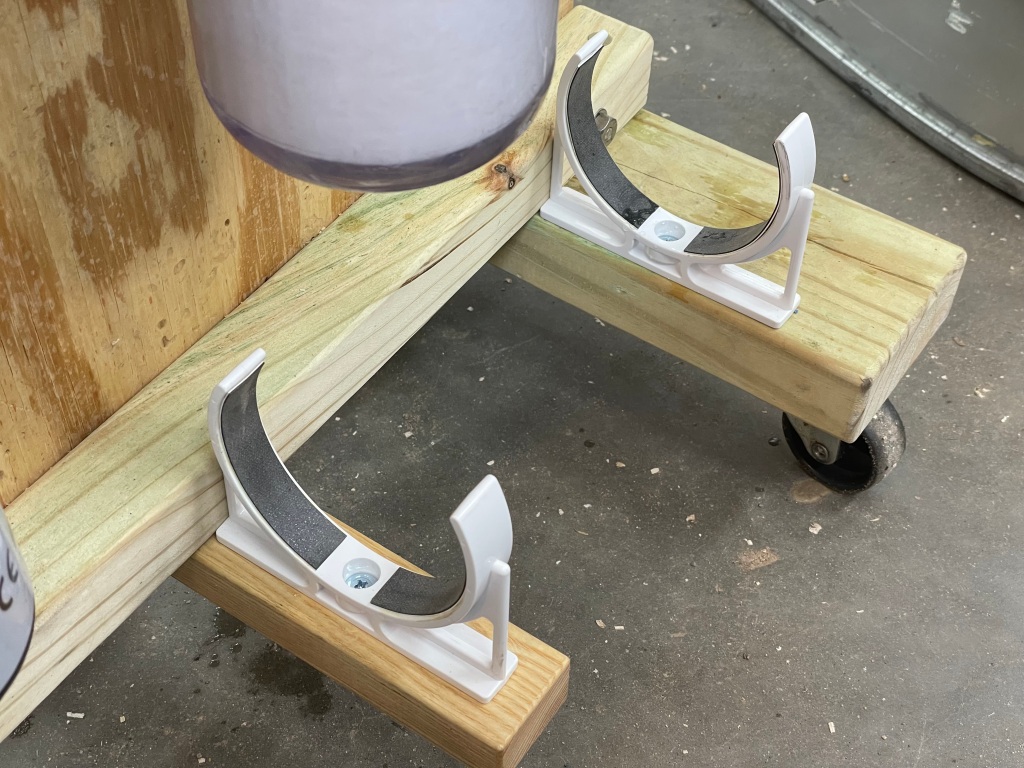

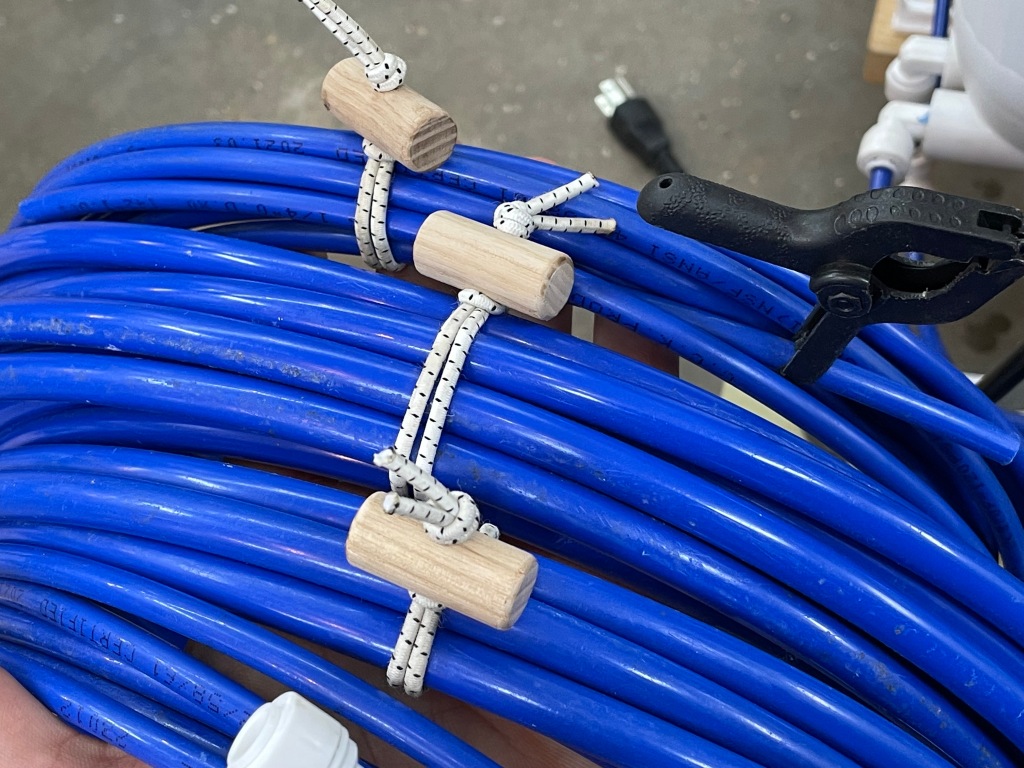

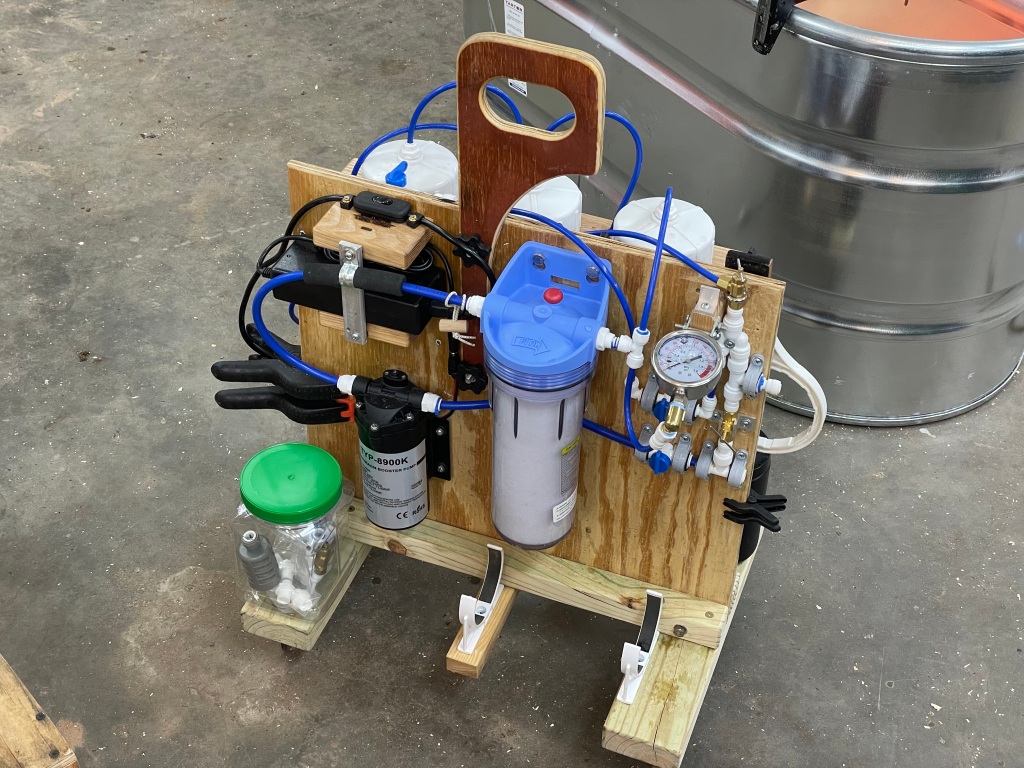
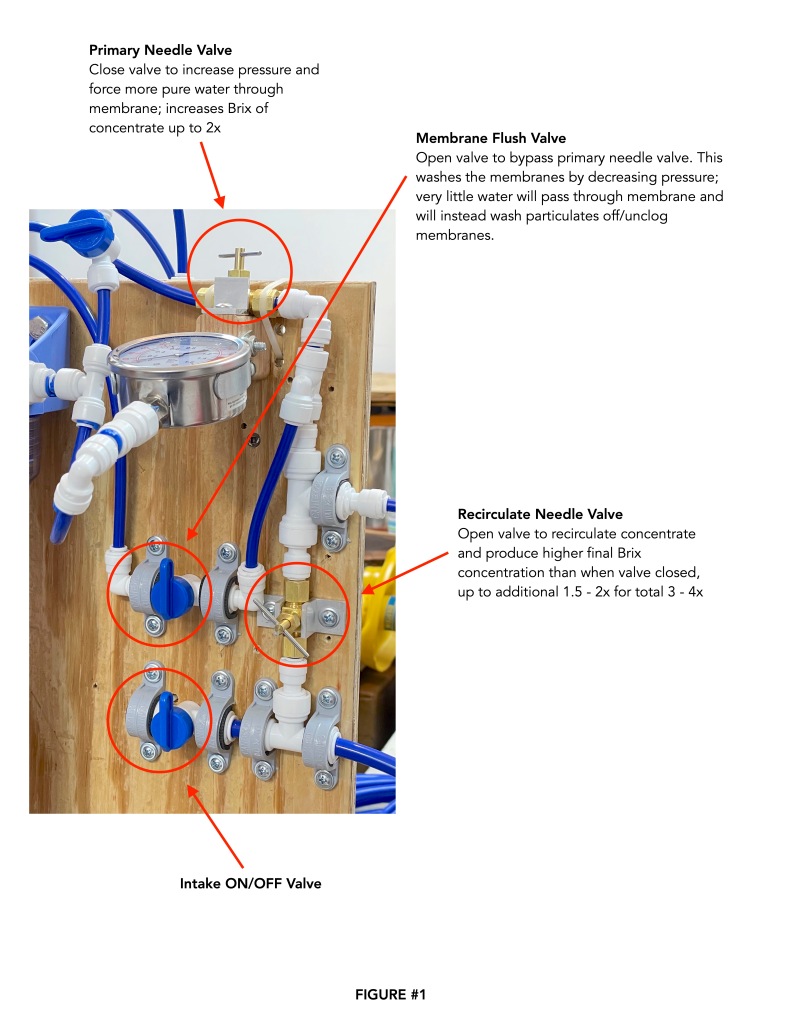
One last thing. I made a user manual for the Ol’man to use the RO. I planned on supplying this system to Dad, but ended up running the boil this year. I really enjoyed boiling and will try to do it every year. But just in case, this is the RO Quick Guide for how to operate the RO. Images of the Guide below:

I am a student of everything and a life long learner. If you get something from this post, shoot me an email, drop a comment here or on youtube, or follow me on Instagram.

Really enjoying your videos and blog posts regarding maple syrup. I noticed an on/off valve in the line between the filter and the input to the first membrane but I’m not clear what it’s used for.
It is there so I can push preservative through the membranes and then close off creating a fully sealed system (membranes) before storing in a cool place until next season.
Thanks for sharing your ro build and lessons learned, you have done much of the heavy lifting. I am using your setup as an example to build my own system. I am building mine with four ro filters leaving a space for at least one additional filter. I have learned a lot from your videos. A question I have is regarding the recirculation valve, is it run either open or closed or are you basing it on the final brix that you are shooting for?
In my setup I have been running it all the way open.
I have been leaving the recirculating valve 100% open and using the primary needle valve to set the concentrate gph to match my boil rate. It is allowing me to push to a higher brix and it also allows for more liquid to wash over the membrane which should keep them from clogging as fast. I haven’t directly measured this on my current five membranes setup but I’d guesstimate that recirculate could boost 50% water removal to 65% at the same psi while not shortening the time between flushing. I may test this out this year to see the time difference between flushing and pressure difference.
Great content. Really like you RO system. I am wondering were you got your inline TDS meter.
I got it on Amazon. Here is the link: https://a.co/d/8aGYEeY
Where did you find the bracket to hold the pressure gauge?
It’s actually a left over part from the clampy-thingy of a standard heat lamp fixture.
Thanks. Tried fabricating one and repurposing but, no luck. I came up with a different plan, should be putting the RO system to work next week.
How did you connect your power adapter to your pump? Did you find an adapter or splice in a new fitting? I hope you are having a good sugaring season.
Pulling off a 380 gallon boil today! I used some sort of splice – the two pump wires are wired into a connector that is compatible with the power supply.