
12.1.2016 – Thursday
The gun deer season wrapped up with warm weather and no accumulated snowfall. Things just didn’t work out for handgun hunting. Despite the lack of success in the field, there was some fun to be had with left over pumpkins from Halloween. When filled with water and shot with a .44 magnum hollow point the concussion ripped them apart in dramatic fashion. It was quite a sight and an impressive demonstration of the power of magnum handgun cartridges. It was also very satisfying to see evidence of a well-placed shot at 75 yards. Another range favorite was shooting gourds with VMAX .223 Remington ballistic tipped bullets. After a successful hit, the only sign of the gourd was a momentary cloud of water vapor and the sound of tiny fragments landing in the woods.
A busy work schedule and the low deer population meant that by best chances for a successful hunt was at home instead of at the cabin. This set of circumstances lead to more time in close proximity to the wood shop. I love a good project, and lately I seem to be more involved with restoration projects than fresh wood and clean sheet designs. That will change this month when I start construction on a Shaker inspired chest of drawers. The rough sawn cherry lumber is already in the shop. But anyway, the latest project and the title of this post has to do with an old cherry rocking chair. I suspect many folks who find themselves with a particular object of sentimental or monetary value do so as a consequence of circumstance instead of intent. An old safe may be bought for the sole purpose of being hidden in a coat closet and protecting money or jewelry, then get resold and then passed on once, and then twice down through family members until one day it is recognized as having a family history, a sturdy quality, and a classic design worthy of preservation. I don’t know the complete story of the Old College Rocker, but I can piece together some of the history.
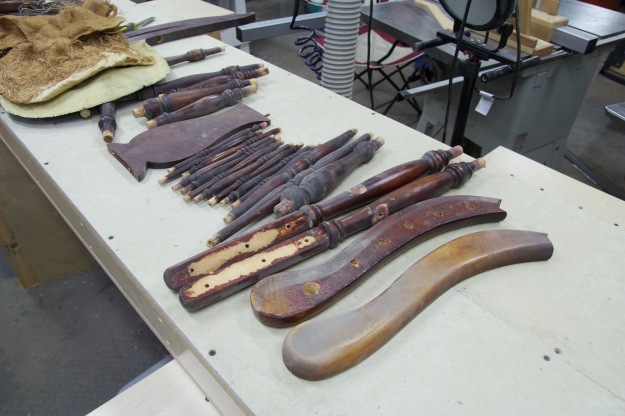
It arrived to me in fairly poor shape. OK… it was one degree away from kindling. Generally, when the value of a piece of furniture is measured in BTU‘s there has to be a reason to save it other than simply it’s monetary value or potential return on investment. The first step I had was simply to figure out what needed to be repaired and replaced. I started a list:
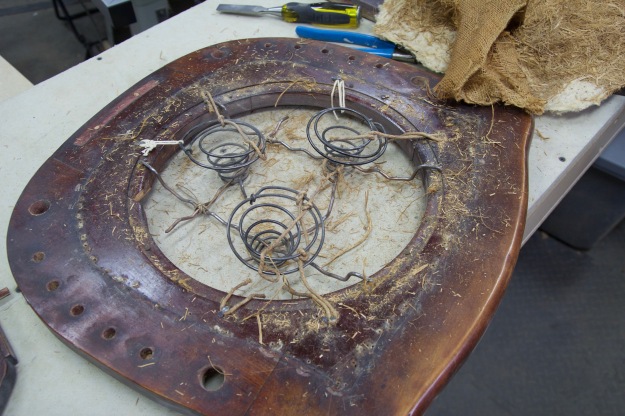
- replace seat leather, batting, cotton under seat covering
- redo all joinery with modern glue and hardwood dowels
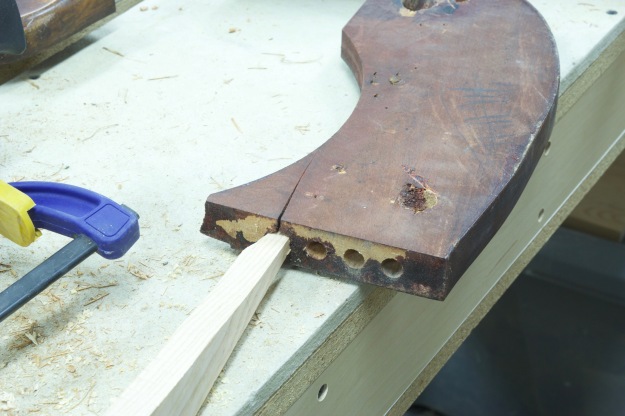
- repair ~10 cracks
- fabricate some pieces for chipped areas
- sand, stain, and refinish
- replace felt on runners (to project hardwood floor at cabin)
I began by repairing several split seat parts. Most cracks were repaired by spreading the wood apart with a wedge and then applying glue to one side. If the crack was large enough I would use a glue spatula to push glue into the crack. For smaller cracks I built up a puddle of glue and then used a shop vac to pull the glue through the crack.
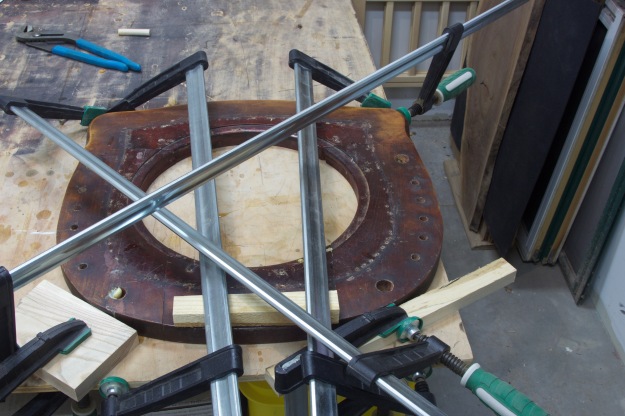
Blue tape and clamps!
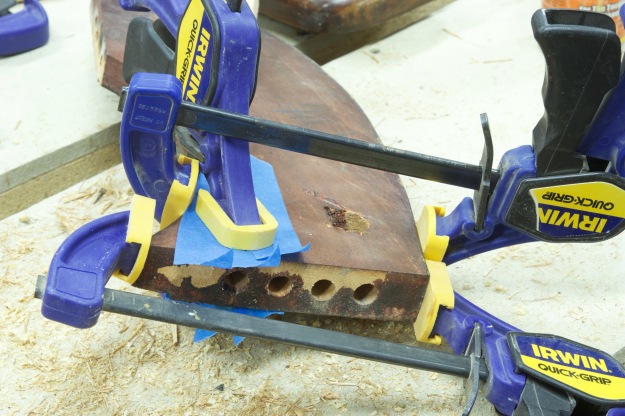
More clamps and blue tape. What happened to this chair?
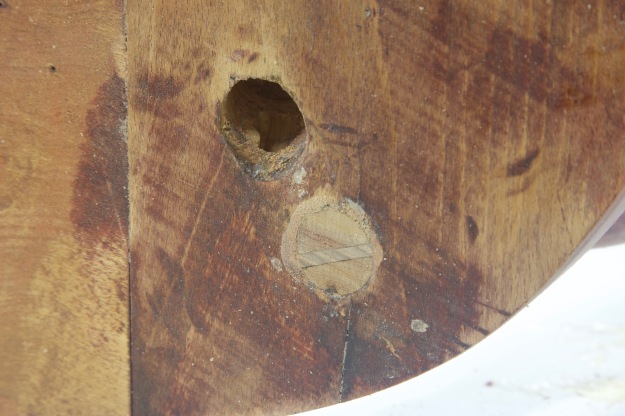
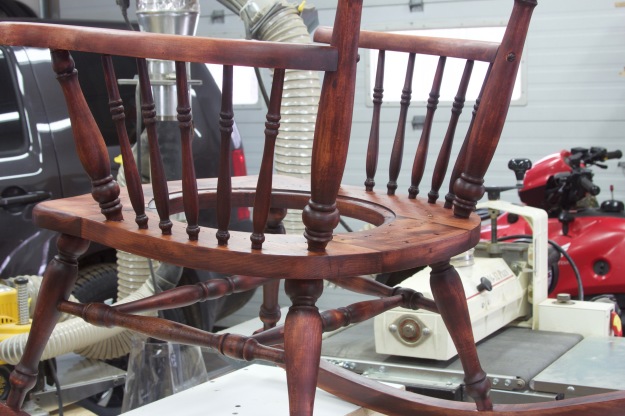
The Ol’Man acquired this chair sometime during college at Steven’s Point. Somewhere along the line the chair was repaired. I found evidence that the legs have come loose previously. Loose legs was the primary reason the rocker found it’s way to my shop. When I investigated further, I found several joints overflowing with extra glue and an oak spindle that should have been cherry. Admittedly, I tried to repair the loose legs two years ago but my fix didn’t hold. One problem with repairing old furniture is that all the old glue often needs to be removed first – that is why my quick repair failed. When modern glue is applied it needs to thoroughly penetrate the wood fibers to form a strong bond to both pieces. For the seat of the chair I was able to drill the dowel holes slightly larger and cut new hardwood (white ash) dowels for a snug fit.
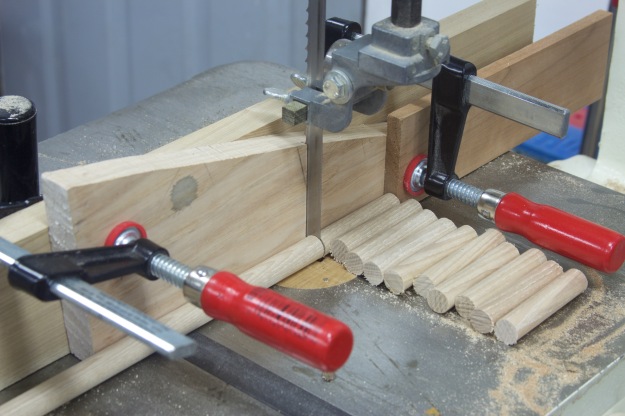

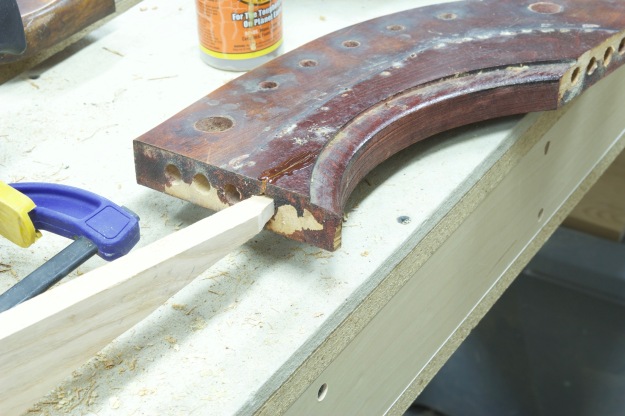
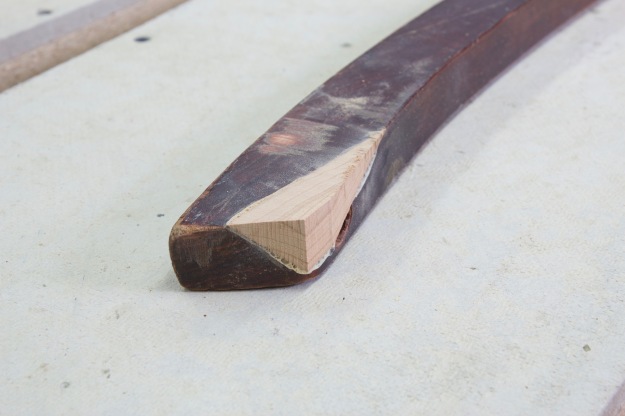
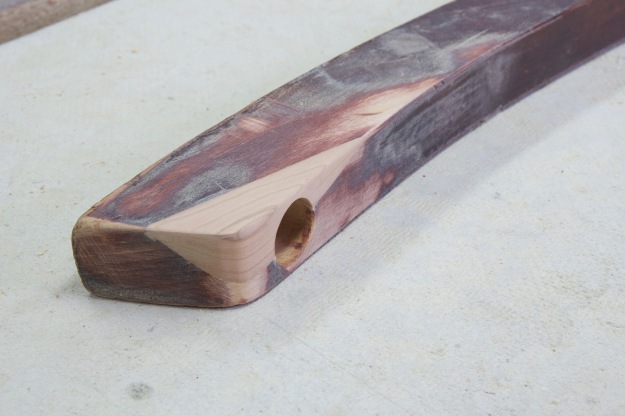
At the bottom of the legs sit the runners. They take a lot of abuse from multiple surfaces and shifting weight. A table chair sits flat on the floor in a single position. Weight is evenly and consistently distributed on it for the duration of it’s useful life. A rocking chair endures shifting weight through a range of motion. Somewhere along the line one runner got damaged and needed repair. The chipped runner was smoothed with a hand plane before glueing on a replacement piece of cherry. Once it was smoothed out to match the contour of the runner the tenon hole was re-drilled.
And then there was scraping and sanding… lots and lots of scraping and sanding. It took forever. I walked away for a while because it was so slow and tedious. I’ll do two spindles a day and be done in no time I thought. I procrastinated a week and then sanded them all in two days.

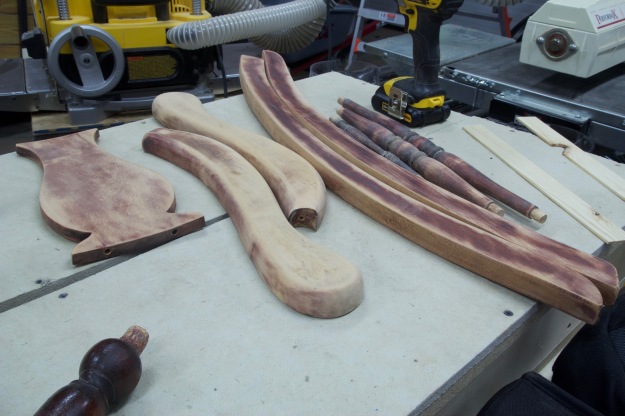
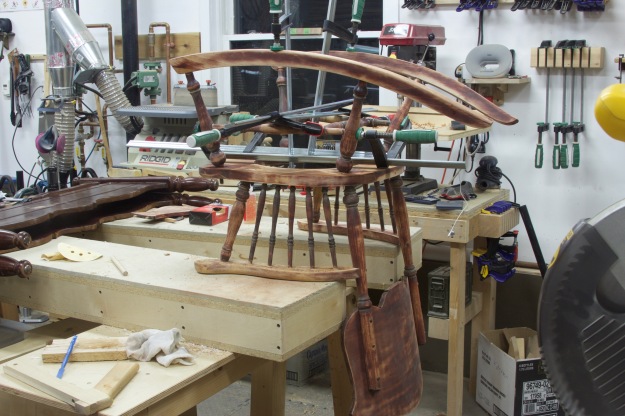
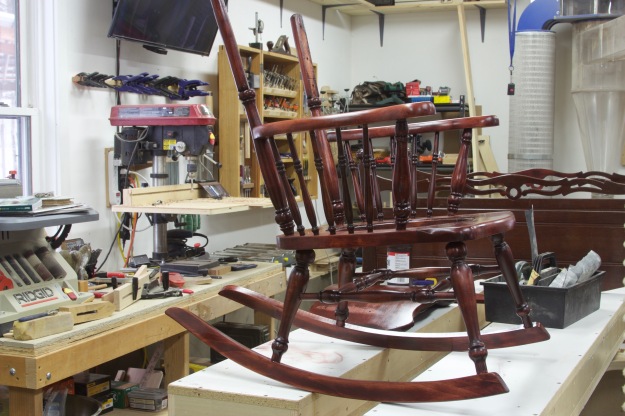
Thankfully, after sanding I could reassemble the chair. Assembly is a very satisfying part of any project. It is even more satisfying on a restoration. The seat was glued up first, then the arm rests and back, followed by the legs.
I used wedged tenons for the arm rests and chair back. One way to make sure a joint doesn’t loosen up is to make it a mechanical joint. A wedged tenon joint is a mechanical joint that physically expands the tenon until it is tight in the mortise. As long as the wedge is in place there is no wiggle and the joint cannot come apart. A little glue locks it all in place.
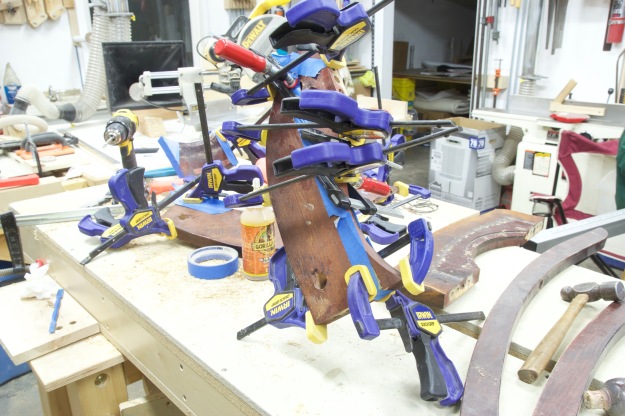
The legs were the biggest challenge. They had loosened before. I cleaned up the tenons and holes, removing the old glue. The joints were not as snug as newly constructed joints. I had to abandon Gorilla Glue in favor of epoxy. I’m relying on the space filling properties and strength of epoxy to hold the chair together for the next several decades. Using a generous amount of epoxy I massaged the joints until all the airspaces were filled. Apply some strategically placed clamps and it was finally starting to look like a rocking chair again.
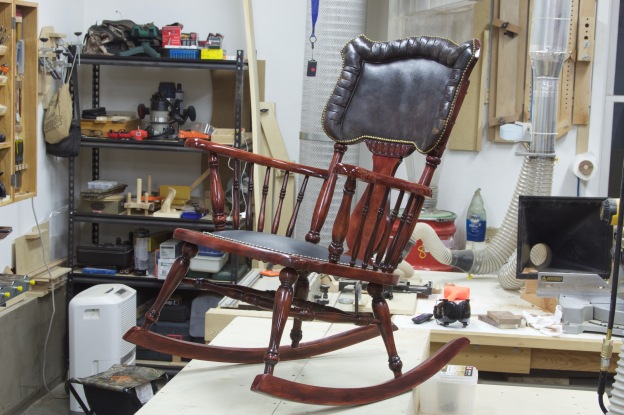
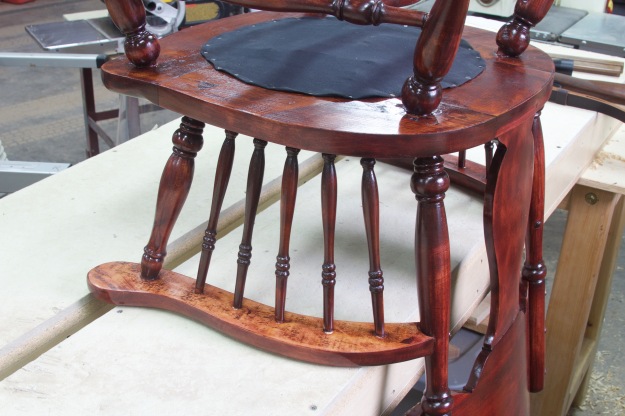
The project was gaining momentum. the excitement of a chair taking shape kept me motivated and the project moving along. It didn’t take long to apply gel stain to the chair.
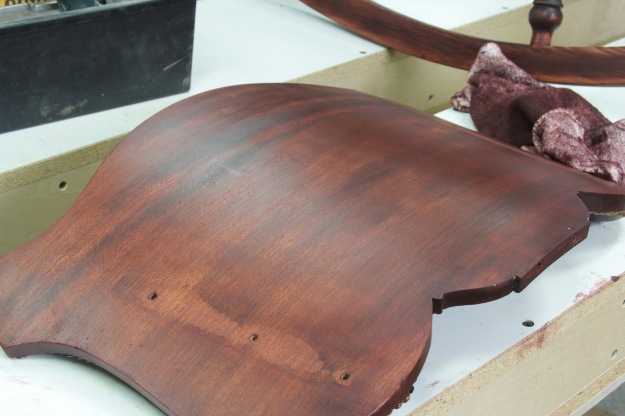
The color was starting to look nice. A few coats of a wiping finish and the chair really took on a rich antique shine.
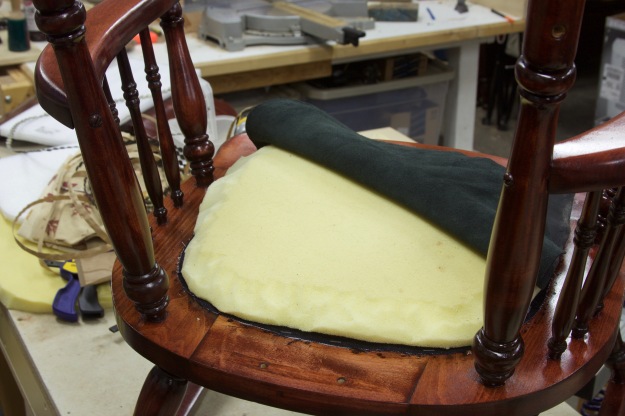
I was entering uncharted territory: upholstery. I referenced the photos I took earlier when taking the chair apart and started to work in reverse. The wire and coils weren’t too difficult. For the seat I salvaged a memory foam pad destined for the curb and the Ol’Man tracked down some leather. It took two tries to get the tack strip on so the leather was smooth and uniform.
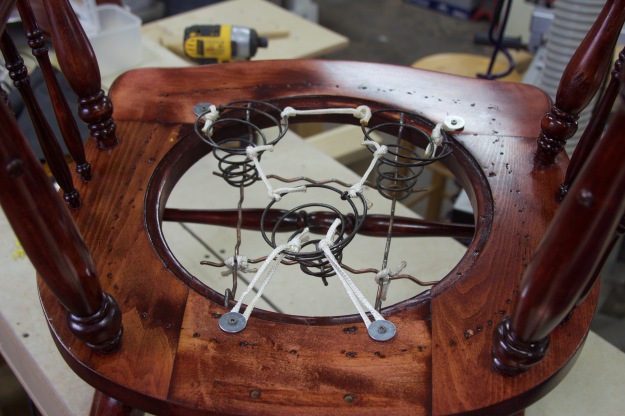
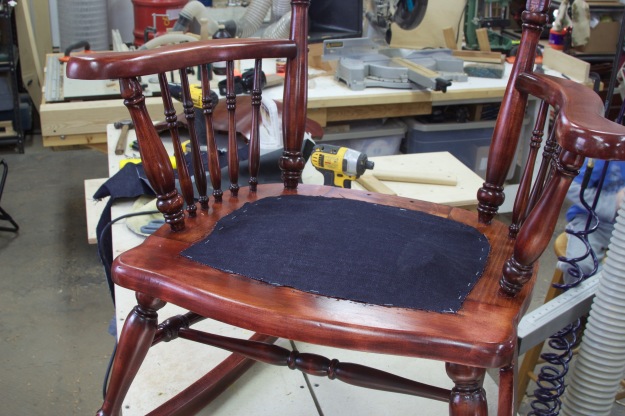
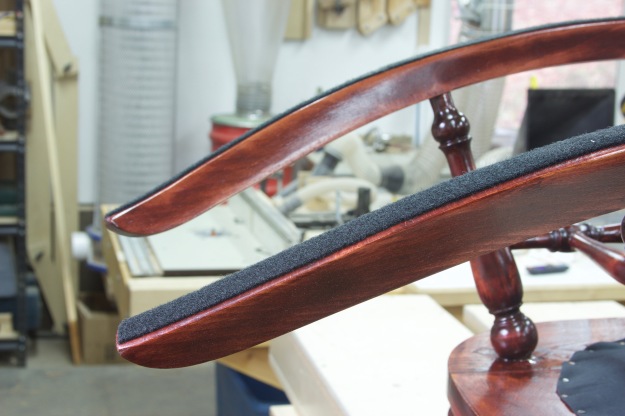
This was about the time the Ol’Man arrived with Mother for Thanksgiving. It looked done but it wasn’t. I had on order some material to put under the runners and needed some fabric to cover the exposed springs underneath the seat. A few days later the rocking chair was finally complete. I trimmed and tacked on the cotton cloth to cover the springs and applied 3/4″ VELCRO strips to the runners. The soft side of self-adhesive VELCRO was used because of it’s touted durability and high-quality adhesive backing. Time will tell, but initial impressions suggest that using the loop side of VELCRO strips is a substantial improvement over felt pads. It looks good too and spans the entire length of a runner.
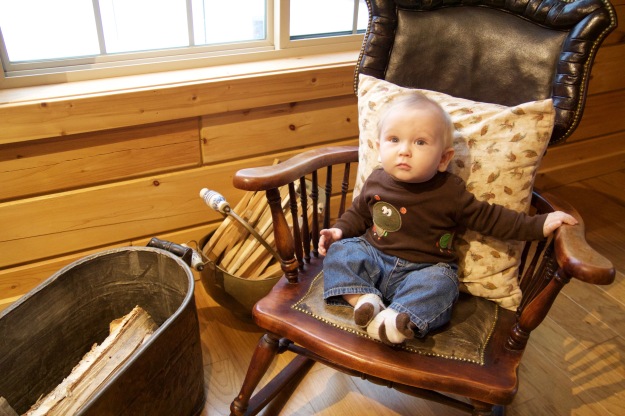
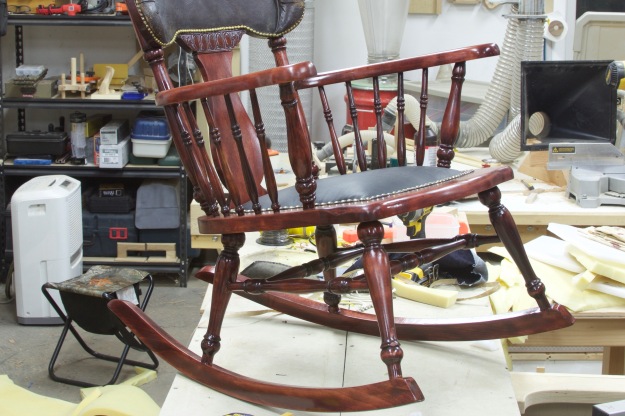
It’s done. Finally. It took nearly a year to complete… mostly because I was busy building bunk beds, camping, cutting wood, and of coarse; working. Total shop time was around 60 hours and materials ran about $80. For the effort and money it might not have been worth saving. But I saved it anyway. I learned some new techniques and tricks and will get to enjoy it for years to come. I know there is a certain cabin-goer eager to take a seat next the window by the wood burner and check trail-cam SD cards on a laptop while birds eat just outside at the feeder. I also know someone, who in February, might like to try it out at the cabin to test out it’s capabilities at putting a newborn to sleep (now if we could just pick out a name).


I finally took the time to read through this. It’s beautiful! I guess my aspirations of fixing up old rocking chairs aren’t ever going to go to this extreme.