1.28.2011 – Friday
I was able to get a good six hours in on the construction of the battery box today.
After giving the garage a good hour to warm up I began work. Actually, to be fair, I had only planned on giving it half an hour to heat up. My plans changed when the ol’ man pulled up my 9422 Winchester (brought along for coyote hunting) and scoped something down the hill and across the pond. The alarm of my Dad shouldering a firearm inside the cabin wore off when he explained things. I grabbed my camera, which still had the 70-300mm lens on it. Earlier I had equipped my camera with the telephoto lens so I’d be ready in case we came across the wolves on the drive in.
At a 150 yards this is as close as a 300mm telephoto lens can get.
a few leaps later, this time cropped to show detail
The common bobcat can commonly reach a mature weight of 30 pounds, or about twice the weight of a common house cat. Judging by how well this cat could move through the snow, 30 pounds seems about right.
With the garage adequately heated (~50°F) I got to work.
Materials list for the project
- 5 foot length of 3/4″ blue label copper pipe
- 3 foot length of 1-1/2″ blue label copper pipe
- copper elbow for ea. pipe
- 4 x 8′ sheet of 11/32 ply wood
- two 8 foot 2 x 2″ pine boards
- one 6 foot 1 x 6″ pine board
- one 8 foot 2 x 4″ pine board
- medium black zip ties
- foam stripping with one side adhesive
- pop rivets
- sheet metal screw
- several sizes of wood screws from 1-1/2″ to 3″
- silicone adhesive
Tools used during construction
- saber saw
- cordless two speed drill
- hand saw
- Rockwell Sonicrafter
- portable table saw
- square
- tape measure
- pencils and markers
- clamp for securing wood to work surfaces
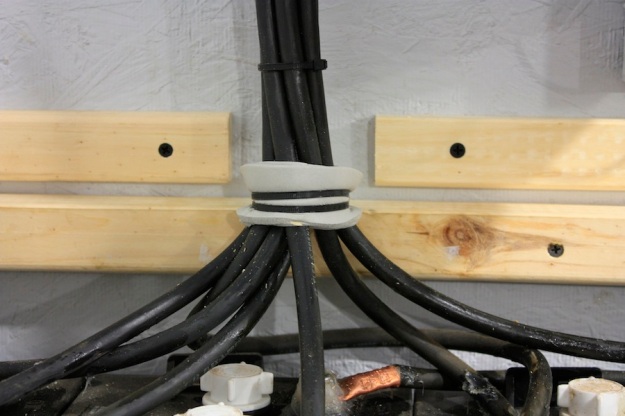
Before I could begin constructing the box there was some housekeeping to see to first. The batteries had to be slightly rearranged. Once the batteries were in the correct place to allow for the pipes to be installed I had to go through all of the cables and make sure the length was appropriate so I could bundle the positive and negative cables together, that way each bundle could neatly pass through the lid of the battery box.
First a ledge for the walls needed to be constructed. The batteries take up nearly all of the space on the shelf. In order to mount sides, while maintaining easy access to the batteries, a strip was added to the side of the shelf. This strip has a bevel that the 11/32 plywood sits in. No latches or screws will be needed to hold the sides on.
Then the sides were made. These were cut with a straight edge and a circular saw. A simple frame of 2 x 2″ boards was used to give the sides rigidity. The corner brace also serves as a good hand hold for getting the sides on and off.
The top took a bit of careful planning. The shelf is not perfectly square. After measuring twice the cuts were made. I cut out slots for the battery cables and then test fit the top. It went as expected, but I was concerned about the wood rubbing against the cables and about the possibility of hydrogen gas (vented from the batteries under heavy charging and equalization charging) exiting through the slots. I had some foam with one side adhesive at my disposal. I wrapped each bundle and then used zip ties to secure the foam and cables. The zip ties squish the foam so it slides with some ease into the lid slots and also decrease the wear on the foam.


