
10.28.2015 – Wednesday
The lean-to at the cabin has either been in planning or construction since the end of 2012. It began when a suitable site was selected near the location of the old cabin. In order for work to begin on the lean-to a visual inspection of surrounding trees was undertaken. The basswoods were cleared out some time earlier and work continued to remove any trees susceptible to falling from the influences of strong winds. This photo is from September 29, 2012 and shows the clearing where the old cabin used to sit. The apple trees remain and the lawn had come in strong.

The concrete slab was added in May 2014. The concrete is a six bag mix and has re-rod throughout, measuring approximately 24′ x 12′. This mix was indicated as the best in terms of strength and durability for our application. The extra Portland cement added a little cost, but compared to the cost of the entire project and the planned lifespan of the structure, the cost was easily justified.

Also in May 2014, the final trees that could threaten the lean-to where fell. there were two near the lean-to site that had dead tops. Once fell, we could see the true damage to the internal structure of the tree. From this and a wind storm from a previous winter, I learned two simple rules for deciding which trees should be removed to protect personal property.
- If the center/top of the tree is dead up to a maximum thickness of 3″ the tree should come down in the next two years
- If there is a spot of exposed wood (no bark) on one side of the tree too large for bark to heal over, it will eventually fall in that direction.

The next major step was the construction of the lean-to. This happened in June 2015. The Ol’ man received help on this one from someone with experience in building construction. Due to my work schedule not aligning with the construction days, I was unable to contribute much on this project. Taken July 18, 2015, here is a photo of the nearly constructed lean-to.
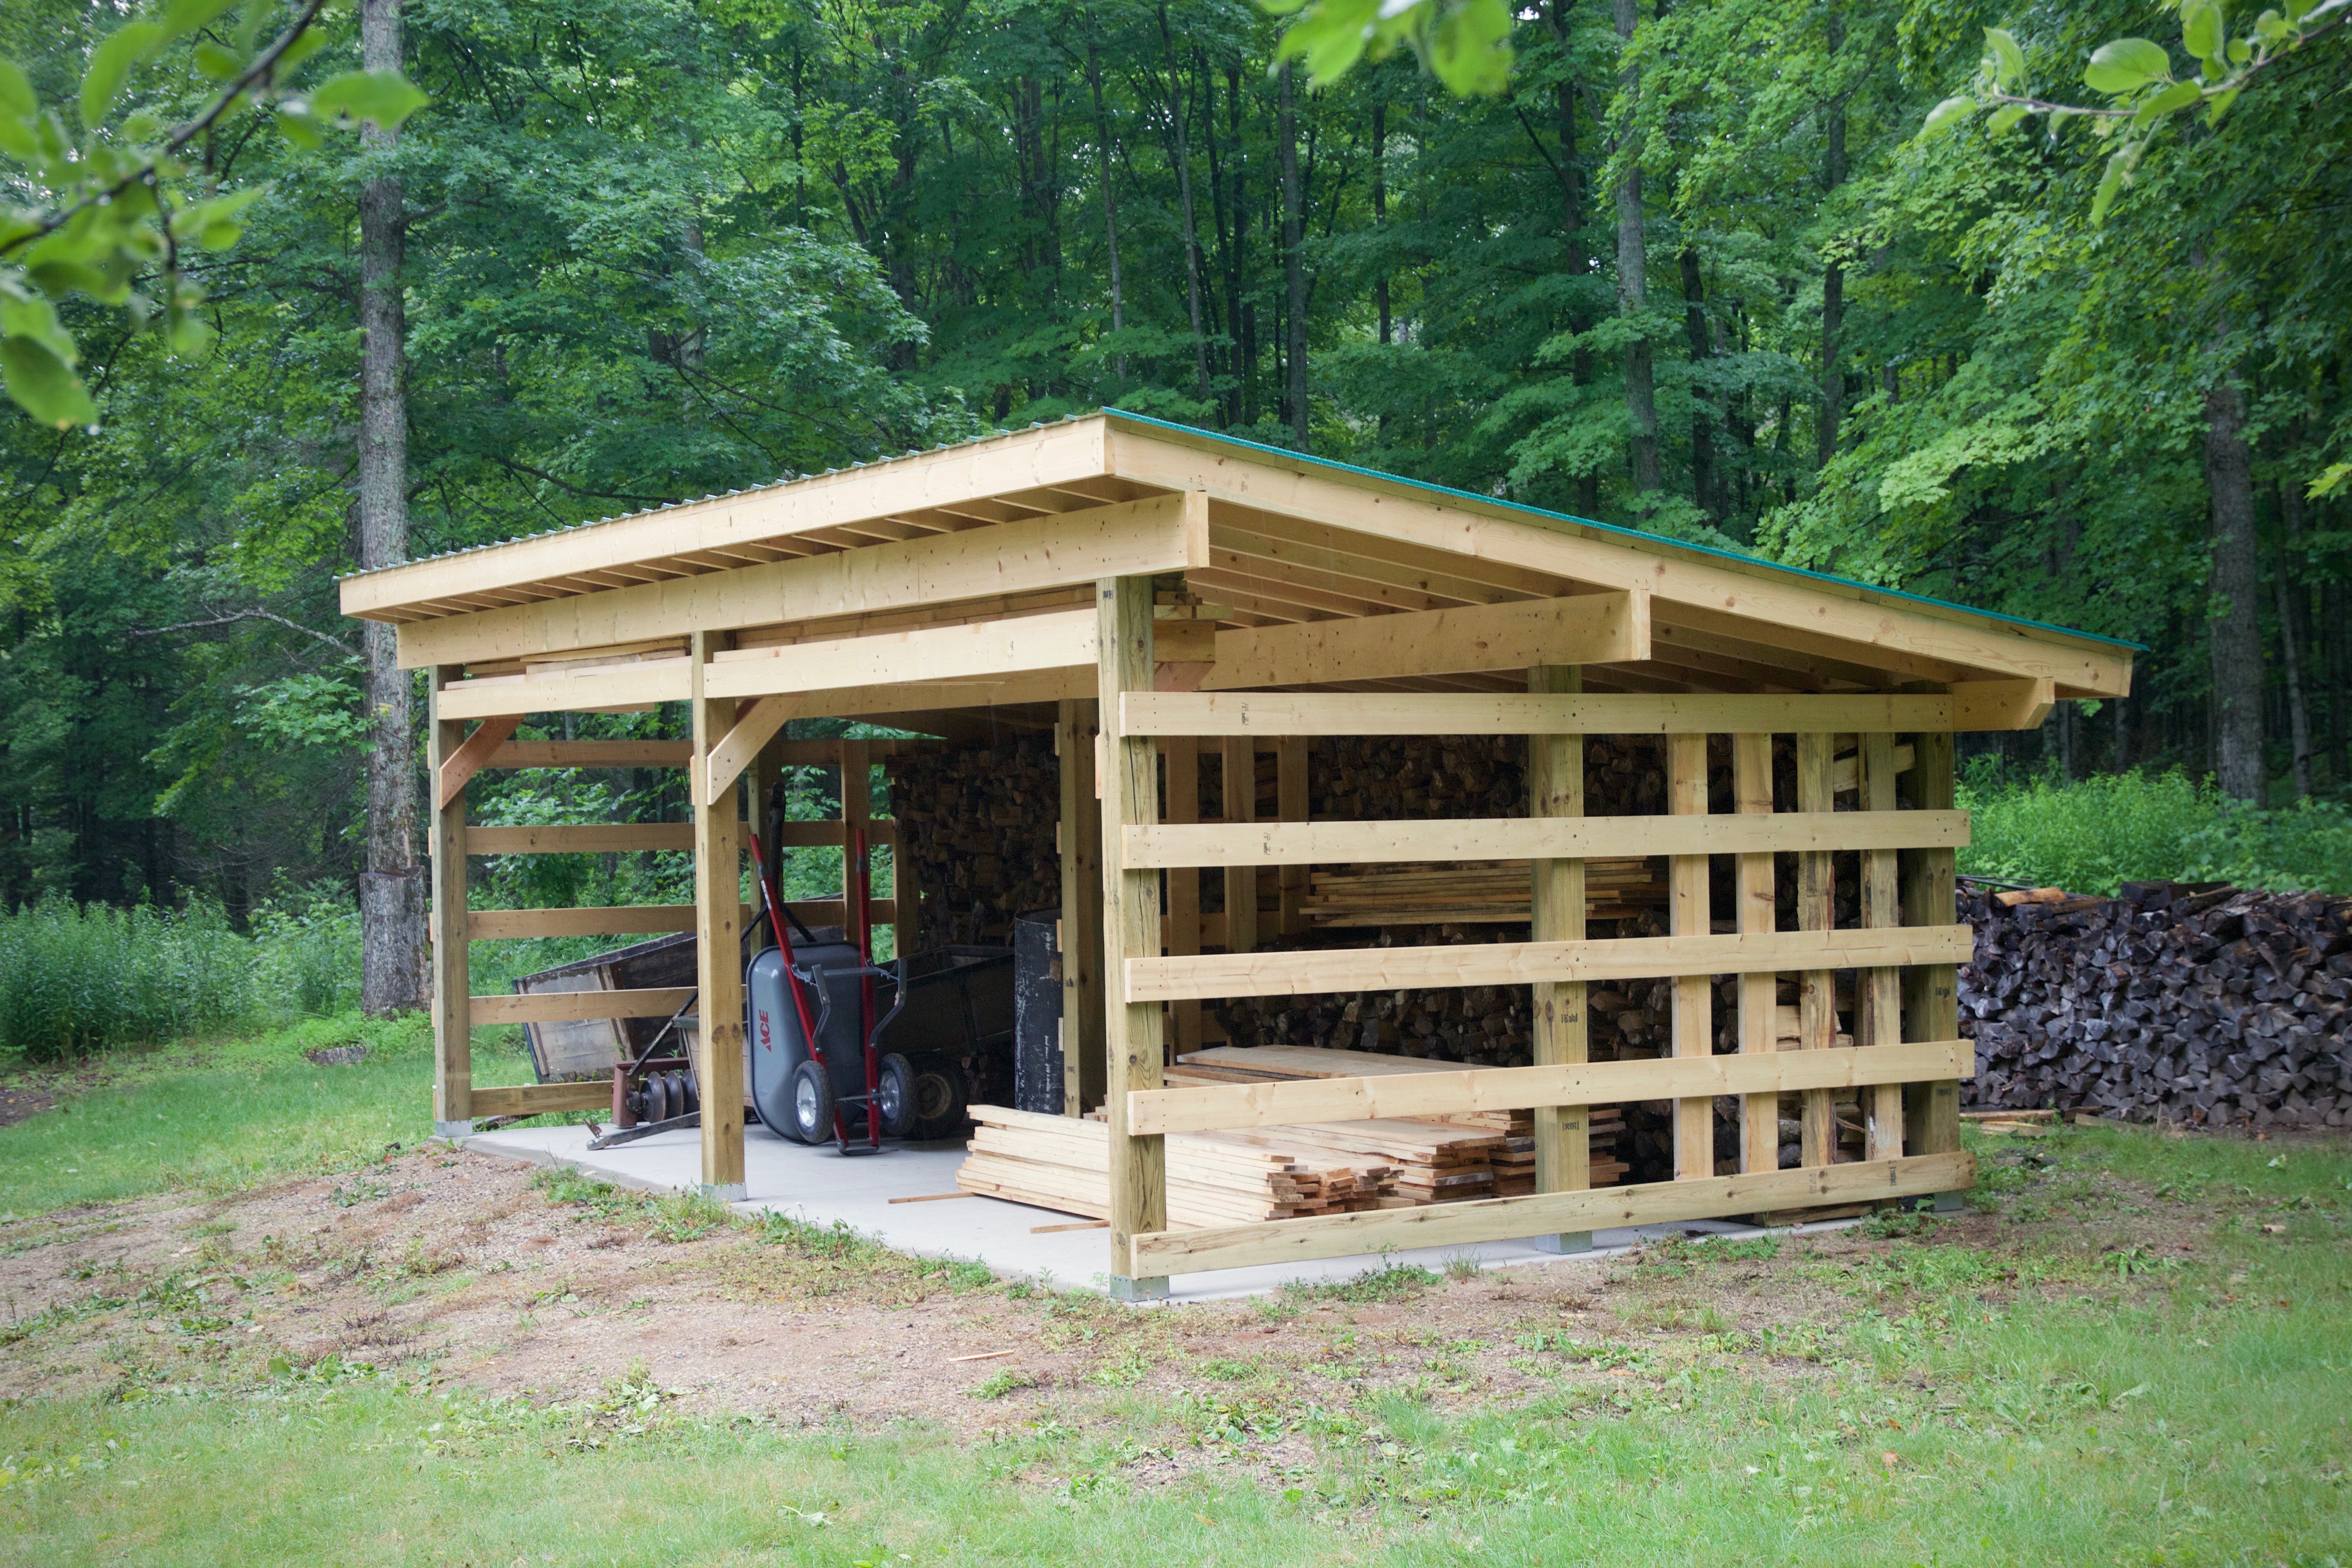
The Ol’ man was already hard at work filling the lean-to. The horizontal boards were installed and the back 1/3 of the lean-to had verticals for piling wood against. By mid-August the pine rough-sawn had been added to the sides. A shelf had also been added above each bay for lumber storage. Again, the Ol’ man took on the task when I was unavailable – actually, while he put up the walls I was busy at work building a woodshed of my own very much like the cabin lean-to.


The last step in the project was to add some color to the siding. This is the finished lean-to, picture taken October 10, 2015.


Some information on the lean-to:
- slab size: 12′ x 24′
- concrete thickness: 4″ & thicker on edges
- concrete reinforcements: 1/2″ re-rod throughout
- height: 9′ front, 7′ back
- roof size: 14′ 6″ x 26′ (1′ overhangs)
- siding: 1″ thick rough sawn pine
- exterior treatment: Sickens SRD
- headers: two 2″ x 10″ glued and screwed together
- headers secured to posts with SPAX washer-head lag screws
- posts: 6″ x 6″ treated posts
- trusses: 2″ x 6″ spaced 16″ on center
Even though my contributions didn’t go beyond site selection and photography I learned a lot from the cabin lean-to project. My own lean-to project shamelessly stole the design principles from the cabin lean-to and I used my fine-woodworking background to figure out the rest. My own lean-to ended up being 32′ x 12′ with a roof measuring 14′ x 34′ 8″ with a 2/12 pitch. A technique I used to notch my beams involved a simple circular saw crosscut jig and a 3/4″ screw-tip auger bit. The remaining material was then easily removed with a large framing chisel. It was much easier to accurately align the notches once the posts were in place than to try to dig my hole to the exact depth needed for pre-notched posts (especially since I found a large immovable object 32″ deep in what was supposed to be a 48″ deep hole).

One additional technique I employed was to use a plunge router and a dado jig to cut the notches in all of my trusses at the same time. Hows that for uniformity? The notches made it very easy to set and align the trusses.


To wrap up and make this a two lean-to post; here is the wood shed I built. The smaller lean-to pictured below was constructed in Fall 2014 and tested the waters for the larger wood shed. The wood shed is designed to store 15 to 16 cord and leave an ally open for the shooting bench (full capacity is 19 cord).


I don’t have a price list for the cabin lean-to but I do have an inventory from the construction of my woodshed. If you are looking for numbers and an exact part list here it is: Wood Shed Supply List. Whenever a new project is started it always seems to follow the rule: spend a little extra, get a lot more. The lean-to at the cabin didn’t need to have a concrete slab, colored tin, and solid-wood siding. But all those extras sure look nice, and give this project the ability to endure long in to the future. The concrete keeps the contents of the lean-to high and dry and the level surface makes it easy to stack and store items. The tin is mostly for aesthetics, but the extra cost was very little given the limited amount of tin required by a project of this size. The wood siding was a bargain – again proving sometimes it’s who you know and not what you know.

Awesome job, is the little shed for syrup making?
Currently the sap cooker resides at the cabin. If it ever migrated to my house I would definitely set up under the small lean-to by the wood burner. Originally we thought about incorporating the sap cooker in the lean-to at camp, but once we figured out how to move it with minimal effort and discovered the motion light on the garage was perfect for night-time cooking we dropped the idea.
awesome cabin and wonderful work do you ever sell any syrup?
We make enough for our uses only. A lot of it gets reduced to maple sugar later for baking, cooking, and even sausage making.