
1.7.2019 – Monday
This post is a long time coming. I’ve been working on making the basement into a kiddo storage facility… err… sleeping area. We’ve had a pool table, dart board, foosball table, and TV downstairs in the game room for a while now. What we have been lacking is sleeping accommodations for the three kiddos that my wife and I take everywhere. We have William (6), Charlotte (5) and Felix (almost 2) and having two adults share two twin beds with three kiddos is just not the best way to build fond memories of the cabin. To achieve the goal of happy sleeping children and having a bed all to myself there was a daunting checklist of items to satisfy…
- egress door to satisfy safety codes
- beds for three
- mattresses + linens
- smoke alarms in the basement
- fire extinguishers
- night lights
I decided to start with the egress door. The current door was treated plywood and two by fours. And it was screwed shut. The extra step of finding a cordless drill and bit while attempting a hasty escape was not quite appropriate for small children. Fall 2017 saw three new additions to my wood shop: Festool Domino XL, CT26 Vac, and ETS-150EC sander. This was the perfect test project to familiarize myself with these new tools.
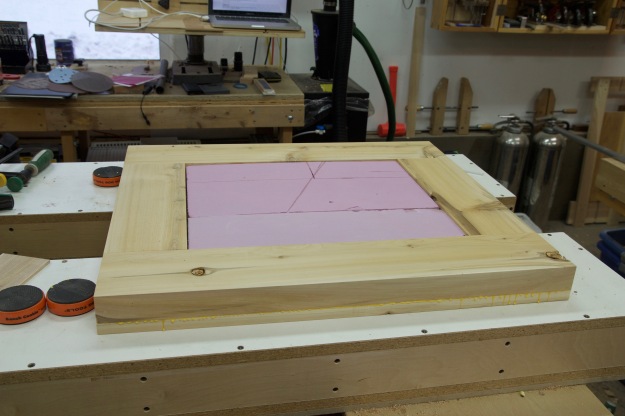
The first step was to build the frame for the opening. Next the door would be built to fit. The Domino XL makes mortises for loose tenons. The frame is held together with large 14mm x 75mm beech tenons. The door is made with an outside frame and panel and an inside frame and panel with foam insulation sandwiched in between the two panels.
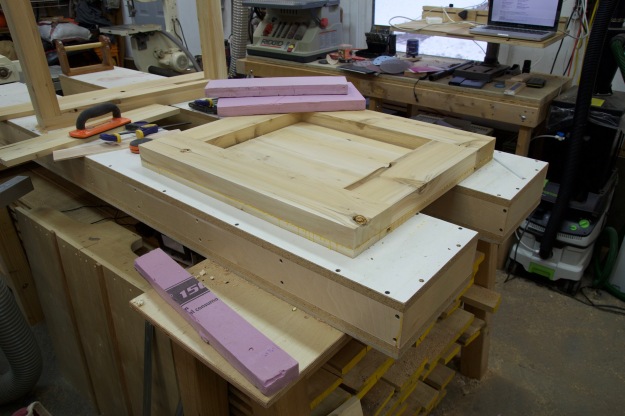
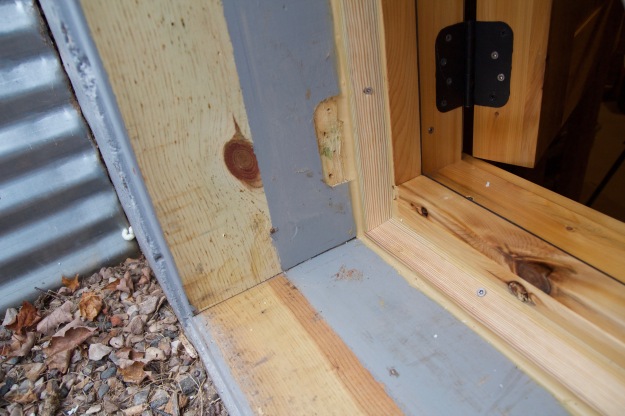
The door frame is almost 6″ deep and has a sill encompassing the opening with a thick foam D-seal making a nearly airtight seal when the door is closed. The two stainless steel screws are overkill. They are 4-1/2″ long and provide extra strength, because why not?
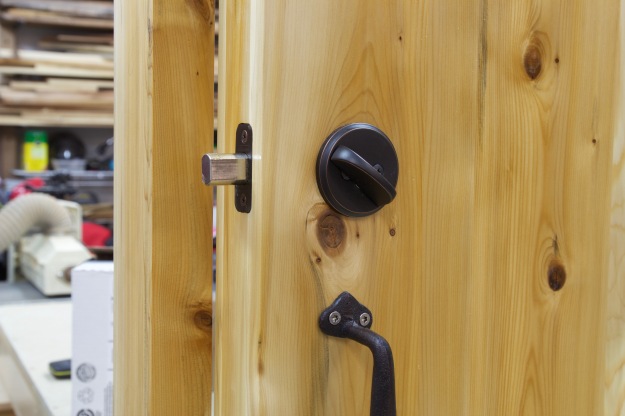
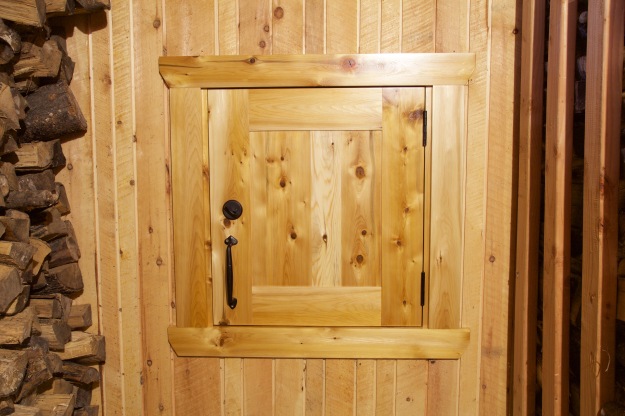
My two older kiddos are very proficient with deadbolts and influenced the design of this door. I’ve been locked out of my own house on several occasions thanks to the deadbolts on our doors. Apparently this is funny. I disagree. Anyway, it made sense to use a deadbolt as a latch for the door. Because the door is nearly 3-1/2″ thick a deadbolt extension kit was ordered and I rekeyed the lock to match the cabin door locks removing the need for an extra key. The door handle is wrought iron and was purchased at a nearby garden center. The mating deadbolt striker plate was secured to the structure using 3″ stainless screws during final installation.
The last step before installation was to precut interior trim to match the cabin aesthetic and prepare some exterior trim from treated lumber that would be cut to fit during installation. The install went smoothly and was finished on Nov 18, 2017. I used sturdy 3″ stainless steel screws for the entirety of the installation and sealed everything with the same caulk used to seal the cracks between logs on the rest of the cabin (it’s some durable stuff). The bare pine, uncovered when the old door was removed, was later painted grey.
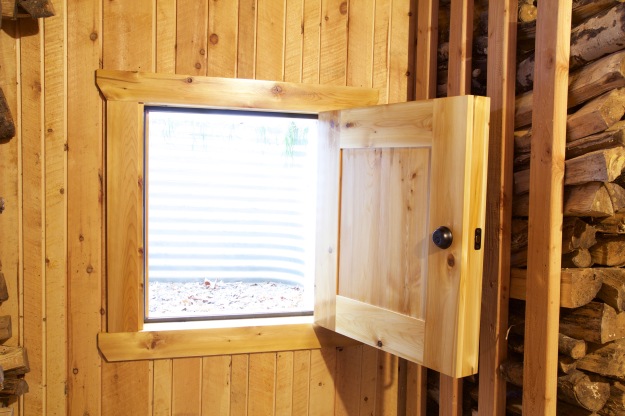
The finished installation is clean. It matches the rough shiplap siding nicely and the wrought iron handle strikes the wood rack, protecting the door from damage. In front of the egress is a small tub that makes a good step for a small child. Both older kiddos were asked to open and exit the door without any prior training or demonstration and succeeded without any issue.
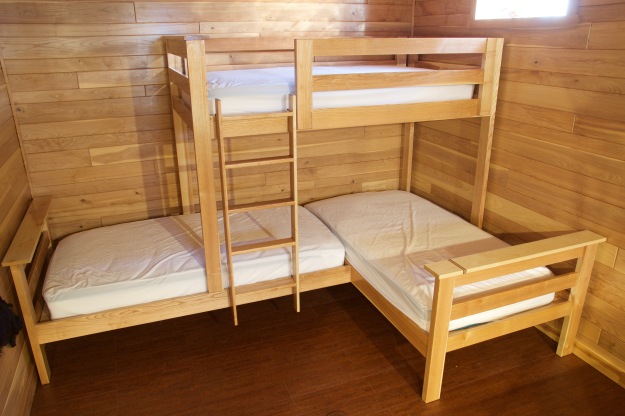
On to the bed next. I started in Late November and finished in early January 2018. I started with some gorgeous kiln dried quarter sawn 8/4 white ash sawn from the home forty. The wood was a pleasure to work with. I really had to hunt to find wood that wasn’t clear of knots and defects.
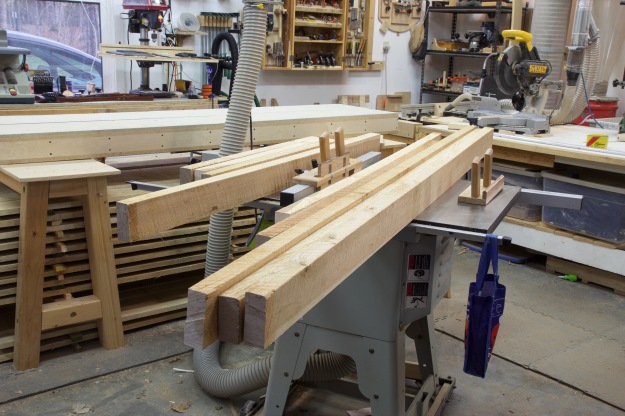
Once again, this project relied heavily on the Festool Domino XL.
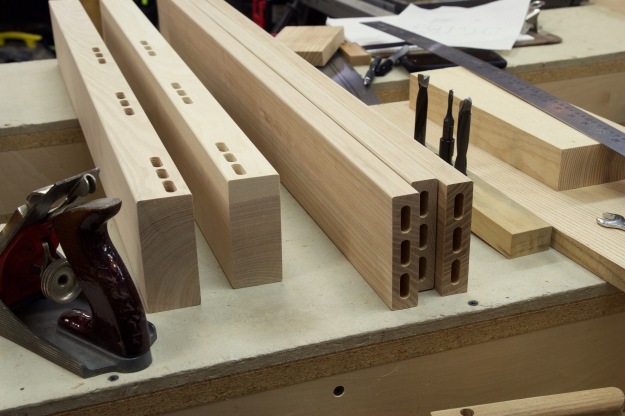
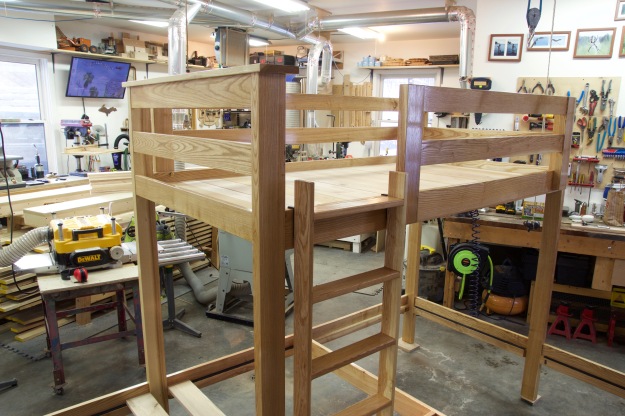
The project went smoothly but took a bit of time. There were many measurements that were double checked along the way. Designing on the fly with this many measurements was mentally taxing. When the bed was assembled in the basement we had about 1″ of clearance between the walls.
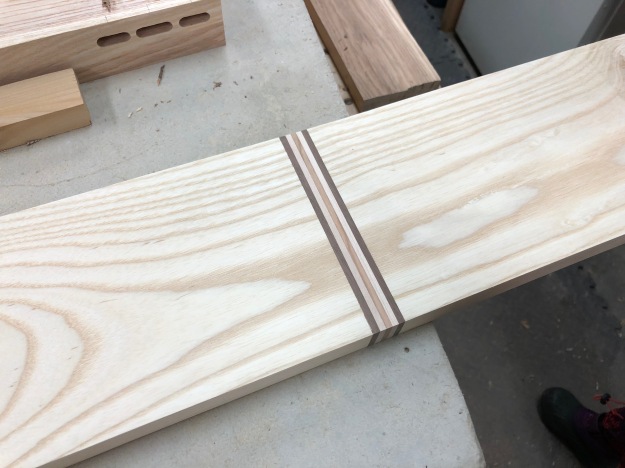
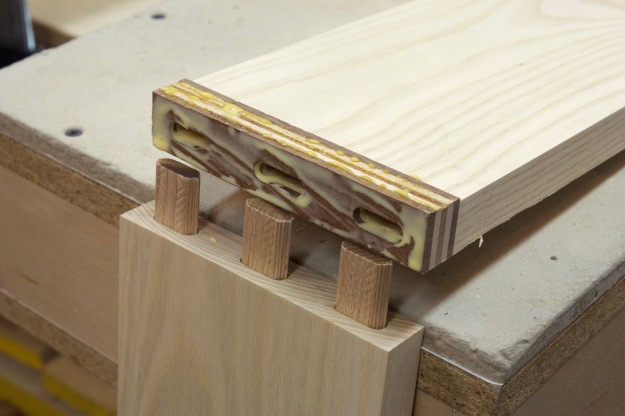
Can you find my apprentice mark? I cut a headboard sill too short and spliced it back together with a decorative touch. Who says you can’t cut a board longer? If you are scratching your head at how that could possibly be a sturdy joint see the second photo. It’s reinforced with three dominos (loose tenons).
Part of the difficulty in designing the bed was figuring out how to make it disassemble and reassemble. It’s a fairly complex set of operations. Have a look.
Just fits! I… er… planned it that way 🙂
I supplied the mattresses and waterproof mattress covers. The mattresses are Linenspa 8″ Memory foam and innerspring hybrid mattresses. They arrived in a vacuum sealed bag. Once the bag is punctured watch out, they expand! At $84 a mattress they will get used maybe 30 times a year and are just as good as the $400 pillow-top mattresses on the kiddos’ bunk beds at home. My mom provided sheets, pillow cases, and comforter, and even a quilt for each kiddo (not pictured).
One later modification was to bolt the ladder to the guard rail (thanks Wood Whisperer Thread Taps). I learned the hard way that a good yank with the right hand on the upper guard rail will torque the support rail something fierce and put too much stress on the domino connector joinery system. No permanent damage was done in uncovering this flaw.
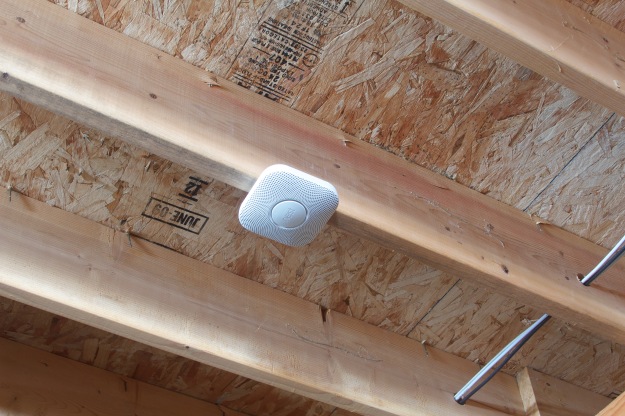
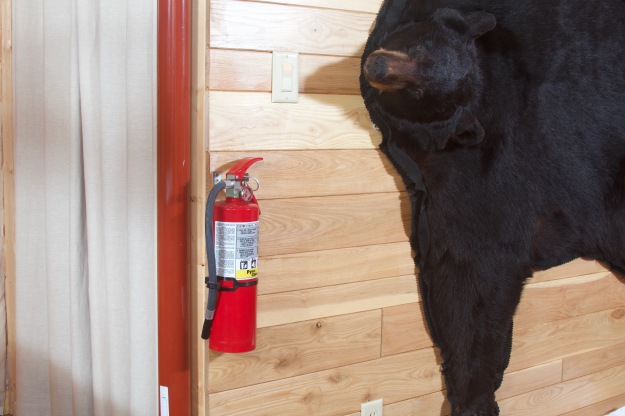
When it comes to fire safety there are two products I endorse without reservation: Nest Protect smoke alarms and Ansul fire extinguishers. They are each best in class products. I will only ever buy fire extinguishers with all-metal parts and smoke alarms with the ability to detect BOTH fast-flaming fires AND smoldering fires coupled with carbon monoxide detection. The Nest smoke alarms are pricey but with the ability to connect over the internet to a smart phone, remind you when to replace batteries, run system checks monthly, detect fire via combination ionization and photoelectric sensors, and wirelessly interconnect (even between buildings) I can’t find a better device.
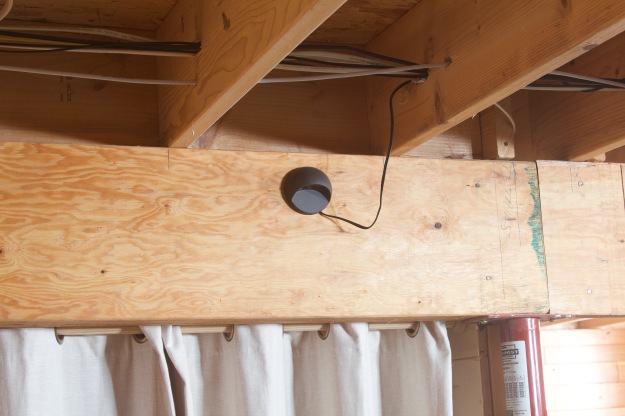
And finally, a night light. A double light switch at the bottom of the stairs was added. One switch controls a 12VDC 400 lumen LED bulb in front of the egress door and the other controls a 12VDC LED path light that has been adapted as a night light. The night light is temporarily mounted in the ceiling. Another suitable nightlight I just discovered is 12V accessory lighting for vehicles. There is a huge selection of brightnesses and colors available.
I’ve slept in the basement and it’s really comfortable! The flicker from the propane fire dances on the opposite side of the room. The 12V night light casts a gentle warmth along the side of the pool table. The mattress is soft and the heavy blankets are cool and feel secure. The glass block windows along the top of the wall ripple like water in the moonlight. In the morning the sun slowly filters in and floods the basement in the warm optimism of a winter morning. It’s no wonder the kiddos love spending the night… or it could just be because we make big breakfasts.


Looks like a fun project. Enjoyed the write up, and the photos.