
4.17.2017 – Monday
Today I finished a project long in the making. There were a few small projects this winter, but for the most part I’ve been singularly focussed on this one massive double project.
I’ve found a lot of inspiration in the works and articles of C. H. Becksvoort and that lead me to an article in Fine Wood Working Magazine. After settling on the plans for a Cherry Chest of Drawers by Michael Pekovich I started taking inventory to see if I had the needed supplies for the build. As it turned out, I did! Enough for two chest of drawers. Upon Sarah’s request I added an additional bottom drawer, making the case a little taller and meeting the requirements of my wife’s clothing storage needs. As I got further into the project I sent an e-mail to C. H. Becksvoort and got a response with much needed encouragement that concluded with “Enjoy the drawers. They are the best part.” That marked the half way point in the build as well as the birth of my third child.

I began by pulling wood from a stack down by the garden area just before first snow of winter 2016-2017. With a stockpile of cherry in the shop I worked to get more maple and pine for the drawers. Luckily, the Ol’ man had a supply back on the home forty. With the supplies in shop and the rocking chair nearly completed I finalized the dimensions for what would become a set of eight-drawer cherry chest of drawers. And began.
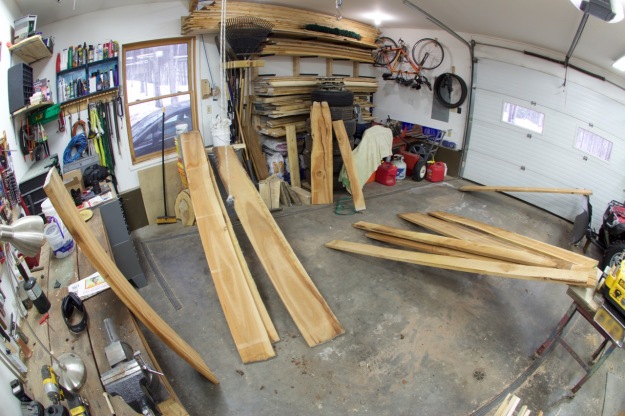
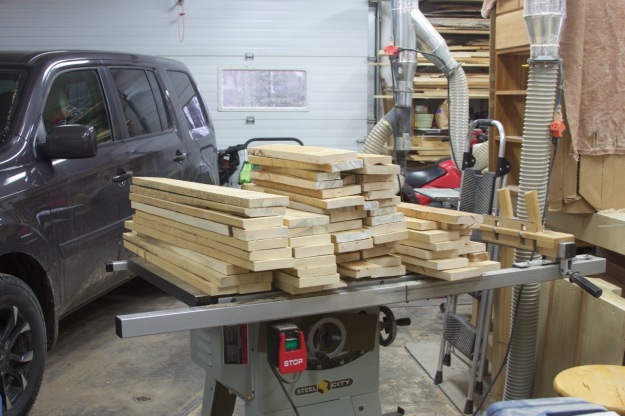
Armed with chalk and a tape measure I dug through my lumber and sorted out what would become the case and drawer fronts. After that, smaller boards could be used for the back boards and drawer dividers. I carefully selected 10″ and larger boards for the dresser top and fronts of the larger drawers.
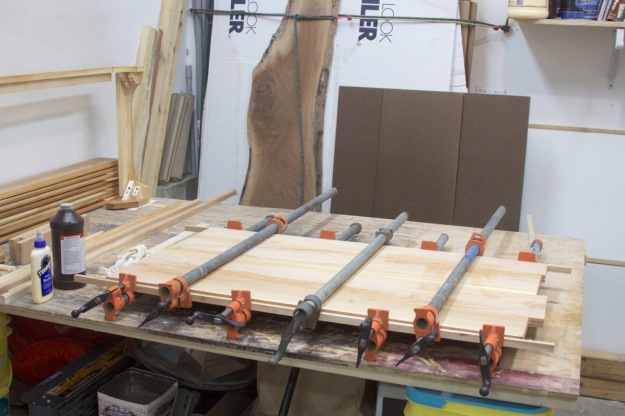
Starting with thick 7/8″ boards I used the router to cut a glue joint for mating the boards together. I used Tite-Bond II for glueing up all panels. The little zig-zags where the boards come together make glue-up easier and lend to less scraping to smooth the resulting panel. Most of the time the panels didn’t need to be run through the drum sander. The few that had less-than-perfect seems were sanded within 12 hours of glue up to ensure flatness before any wood movement could occur. It’s best practice to assume that all boards will move and plan accordingly. On a large panel I flatten immediately after glue up. When building small drawers I try to cut dovetails and glue up within 24 hours of final thickness planing on the parts. If time allows I like to plane my materials 1/8″ oversize and let it sit for 48 to 72 hours before final dimension is achieved. Over time I’ve learned the humidity profile of my shop. Running a dehumidifier all times of the year and holding 40-45% RH has created a very predictable work space for wood movement. I find it preferable to work with dry wood that will expand with the seasons instead of shrink with the seasons.
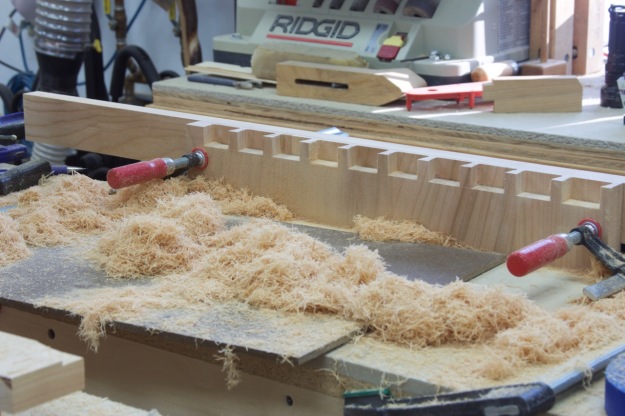
The next step was joinery. I started with the tails. with the tail boards cut I moved on to the pin-boards. Extra care was taken on the case. The pins will be visible on the top of the case and the cleaner the joint the better the top would look. I supported all my cuts to prevent tear out and took tiny bites. Everything was hand fit and shaved carefully after every test-fit. Eventually the fit was clean and snug.
To prepare for the drawer guides I built a router guide and then cut the dados. With the dados cut I then routed the sliding dovetails deeper into the dado. Once all the joinery was completed on the case I was able to assemble it (and breath a sigh of relief – a mismatched dado from one side to the next would have been crippling to my moral). I used gorilla glue, a polyurethane based expanding glue. It has a longer set time and it is slippery, which assists in large glue ups with tight fitting joinery. The glue can also be sanded without clogging sand paper and is easily removed from the inside of the case using a cabinet maker’s plane. It’s more flexible than Tite-Bond and tends to move with the wood, preventing the phenomenon of raised glue-lines. Raised glue-lines occur when wood shrinks and the glue does not. Running your hand across a surface with raised glue lines reveals each seam between boards. The thicker the panel the greater the raised glue-line may be. However, I prefer Tite-Bond for glueing up panels using up to 1″ thick stock because of it’s fast set time of about 30 minutes compared to 2-4 hours for Gorilla Glue.
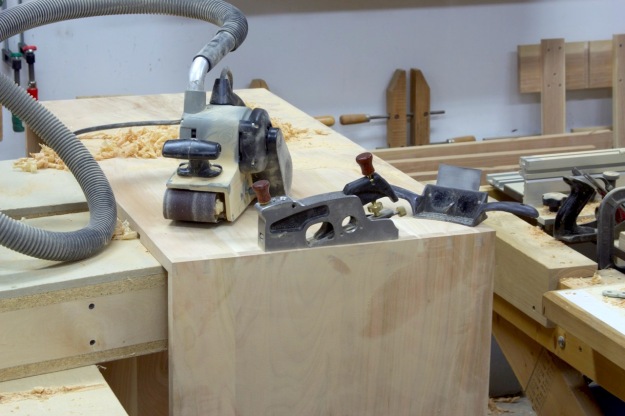
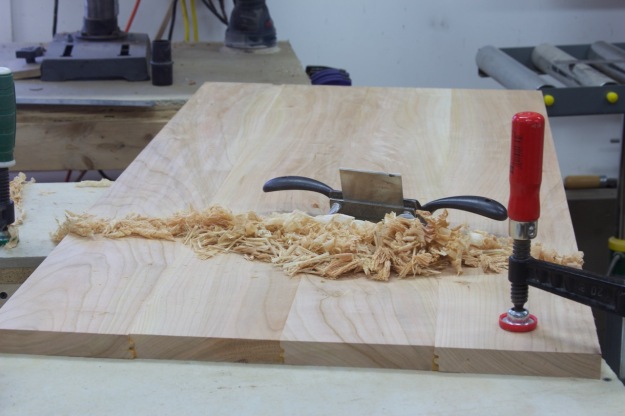
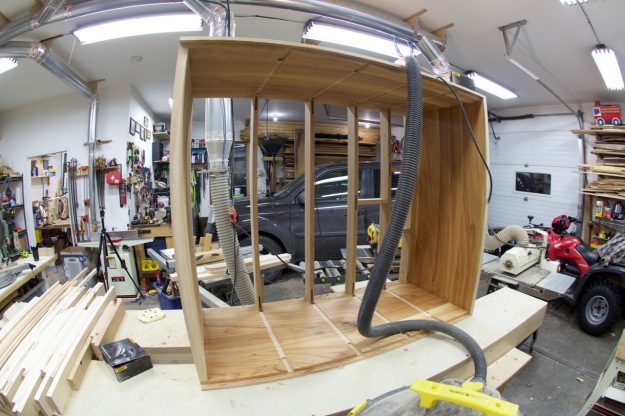
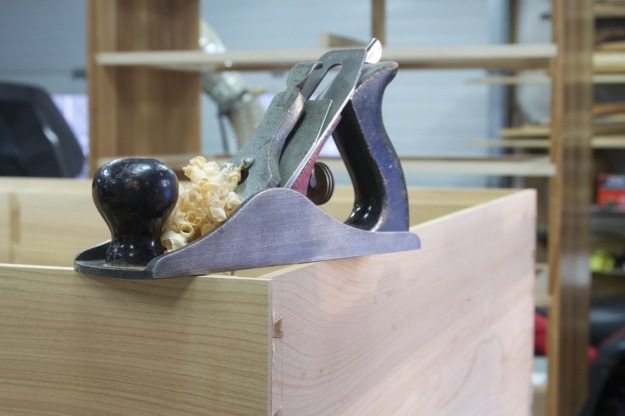
The assembled case was then scraped and sanded. The large Veritas shoulder plane was the perfect tool for shaving end grain on the dovetailed corners. And it is quite satisfying to see perfect end grain shavings. The belt sander makes me nervous but saved a bunch of time on the large panels, as long as I stayed away from all the edges! I didn’t dare go within 3″ of the dovetailed corner. I needed perfect edges for applying the trim and fitting the base.
Here we have the dividers. The front dividers are cherry and the back are hard maple. The plans called for soft maple but I was all out. I’m also still a year away from having basswood and poplar at the ready. Unable to find a downside to a harder wood I moved forward. The dividers have a dovetailed end and two, three, or four mortices. Dovetailing was done on the router table… very carefully standing each piece on end. Each one was hand fit to the case before any joinery. Each was also carefully labeled because sometimes one would fit better if it were a 1/16″ longer or shorter. Little variations like this are part of a hand-fit look… if you can even identify the slight variances. I also prefer to fit everything so it is un-stressed in the hopes that seasonal movement will not compromise a joint and lead to the unthinkable: a split or crack!
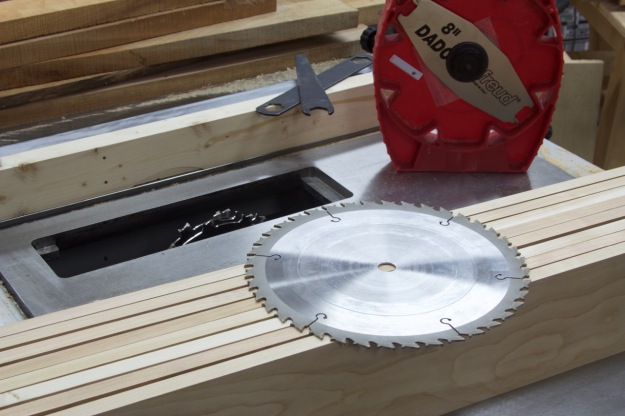
I took a break from joinery for a bit to make the eight boards for the back of the case. No great feats of joinery for this step, just a simple rabbit cut with a dado-stack on the table saw to make the half-lapped boards.
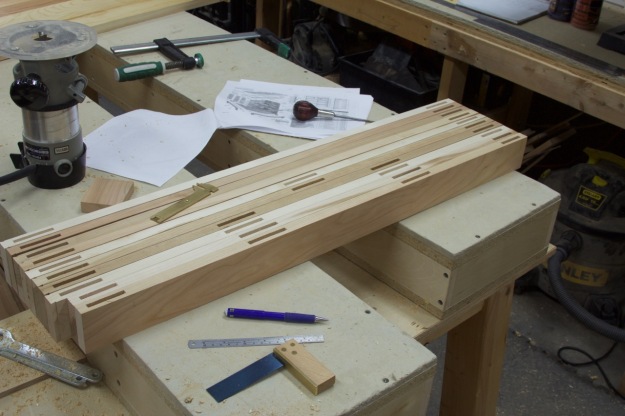
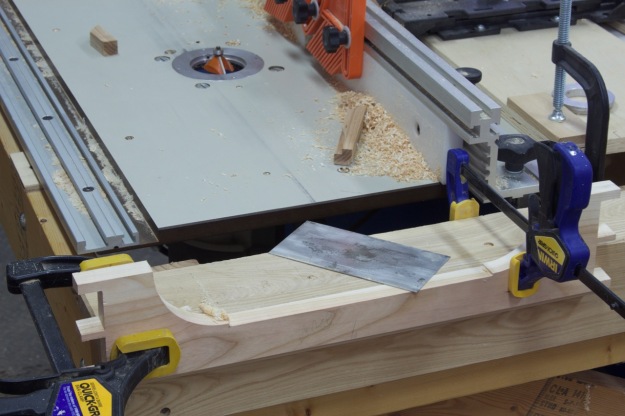
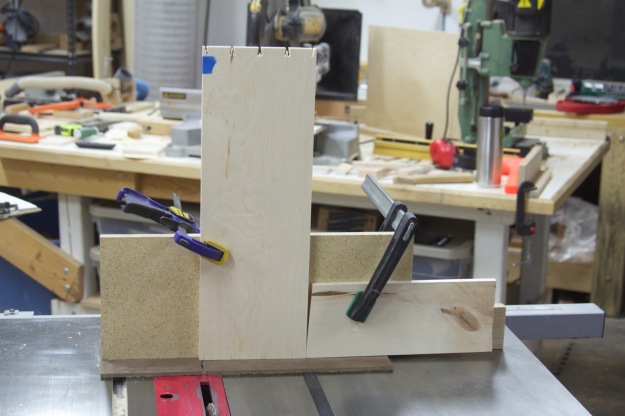
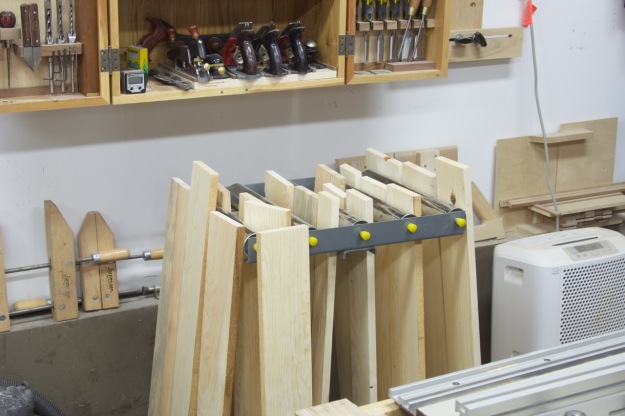
After a break from technical work I delved in to some ultra precision work on the router table. I made several dovetailed blanks that wold get shaped in to trim to attach to the top of the chest of drawers. The track was also cut carefully from hard maple with several extras being produced, providing me with a selection to choose from later on with fitting the trim to the track. The more track pieces, the better chance to find the perfect fit.
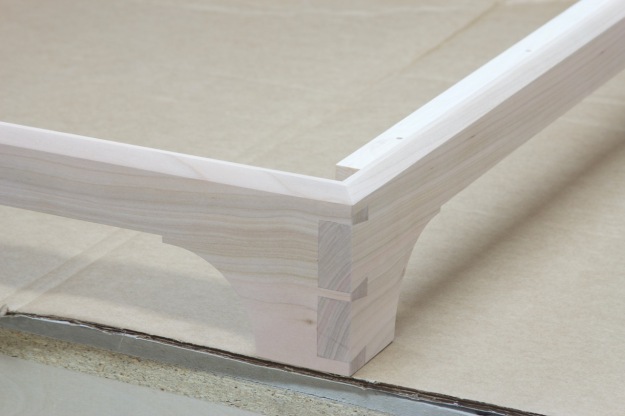
Keeping in line with precision work the bases were constructed next. Some carefully cut dovetails were created and then followed up with a perfectly fit miter.
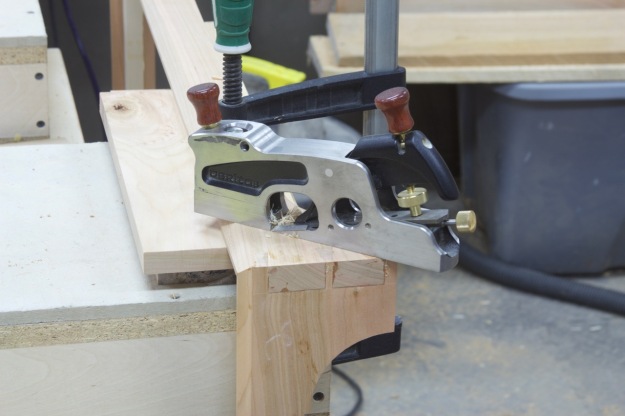
On the bandsaw I cut the arches and fillets for the base. Clamping the base sides and front to a flat block of ash on the shoulder of my router table acted as a guide for my card scraper. The jaggy bandsaw cut was tuned up perfectly straight and smooth. An old block plane that I ground down served as a cabinet maker’s plane. Don’t feel bad about for this antique plane, it was acquired for cheap and hadn’t been used in decades. Cutting off the front of block plane gave it new life, earning it a place in my tool cabinet. I like to think that this is preferable to sitting in a box somewhere rusting away.

The cherry base received reinforcements with hard maple screw/glue blocks as well as a hard maple ledge to attach the base to the chest. A rabbit in the base supports the chest, so the maple ledge is really only there to strengthen the structure of the base (keep it straight) and attach the base to the chest while allowing for seasonal expansion and contraction.
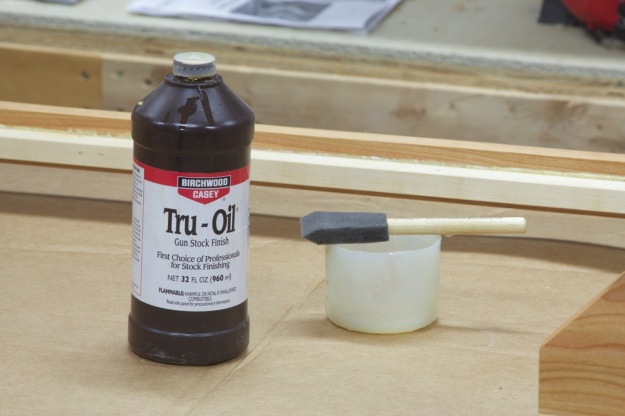
The dovetails were cleaned up (If you can’t tell that I love my Veritas large shoulder plane you have been looking at the pictures) and I applied finish. Throughout the project finish was applied as I went. It was nice to build in stages and helped to keep me sane, providing some satisfaction and sense of accomplishment as I moved from one stage to the next. Though it wasn’t always, finishing is now a deeply rewarding and somewhat relaxing part of any project. I favor the application of a wiping finish with a foam brush. I then wipe off the excess with a rag lightly wetted with low-odor mineral spirits. Between coats I will buff with 000 or 0000 steel wool, taking care to clean the wood with compressed air and tack-cloth before the next application.
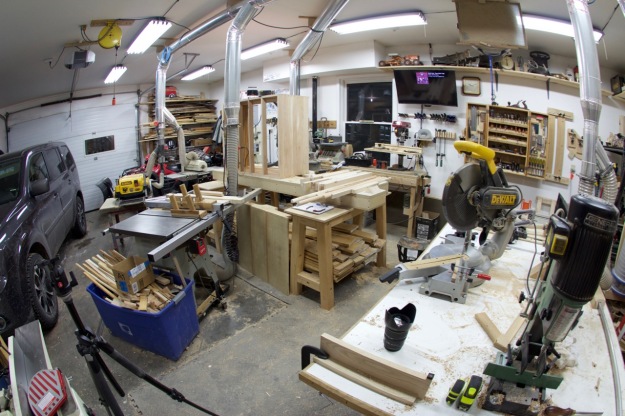
What a mess… but at least there is progress. You’ll notice it is dark out. I finished at least half of my work after night fall, after work, after the kiddos went to bed. Hopefully my wife will look upon her chest of drawers with fondness as she thinks of the depth of my love… or contempt for leaving her alone nearly every night this past winter.
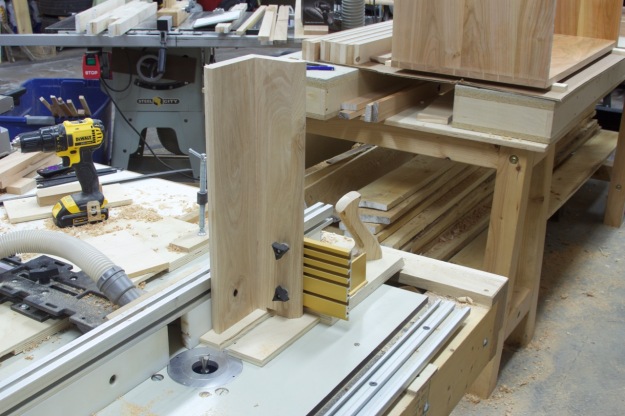
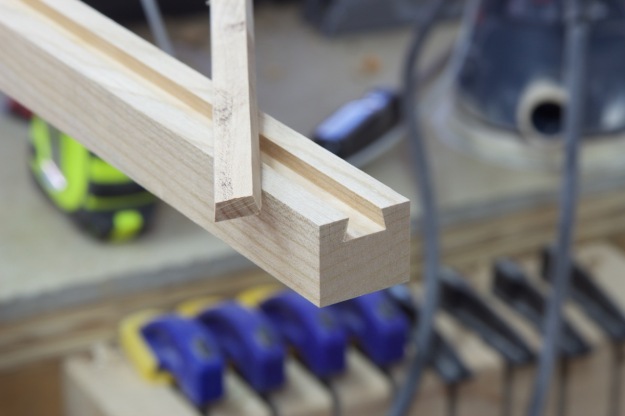
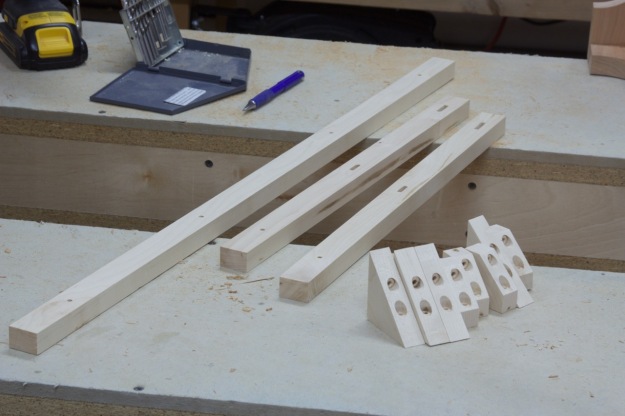
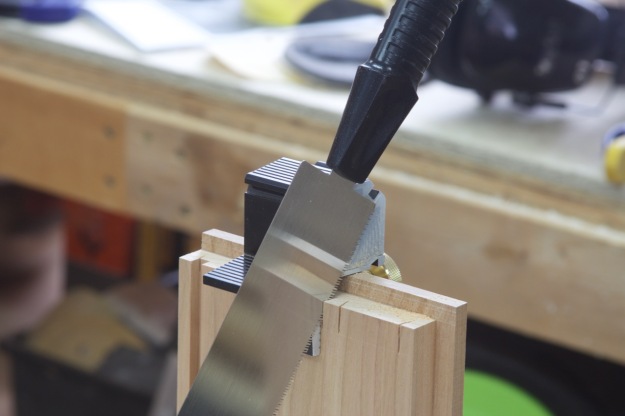
I batched out the tenons on the table saw with a dado stack and then cleaned them up with a shoulder plane and chisel.
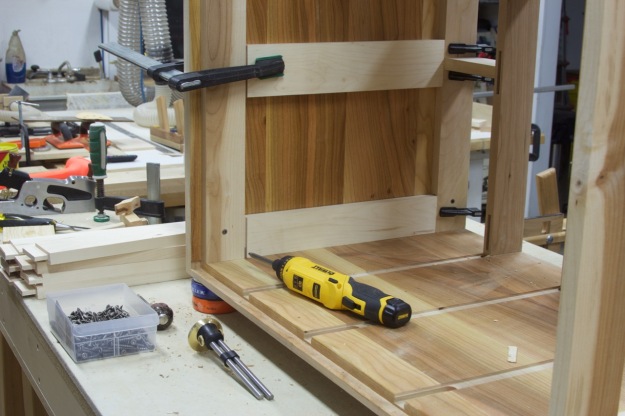
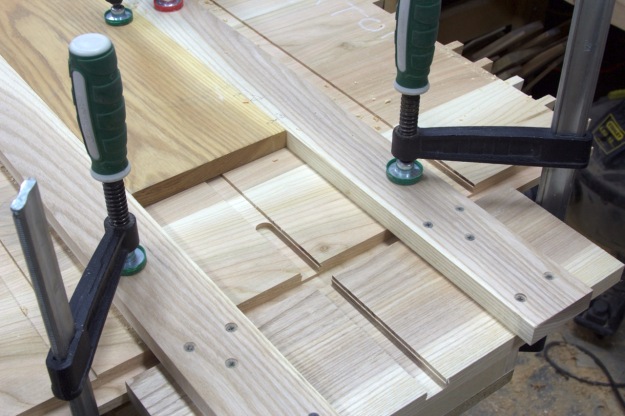
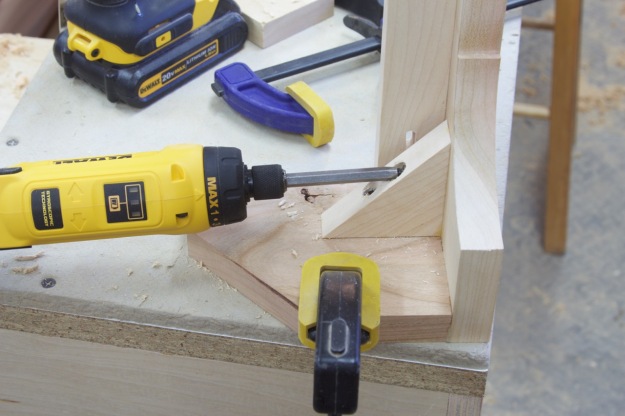
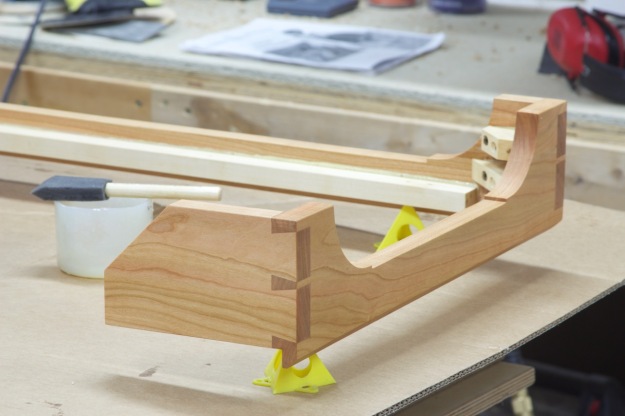
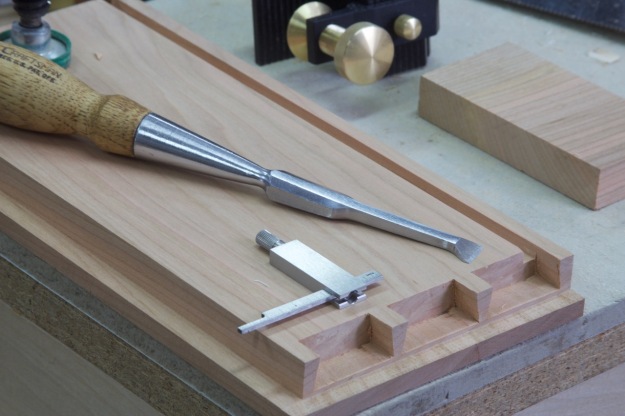
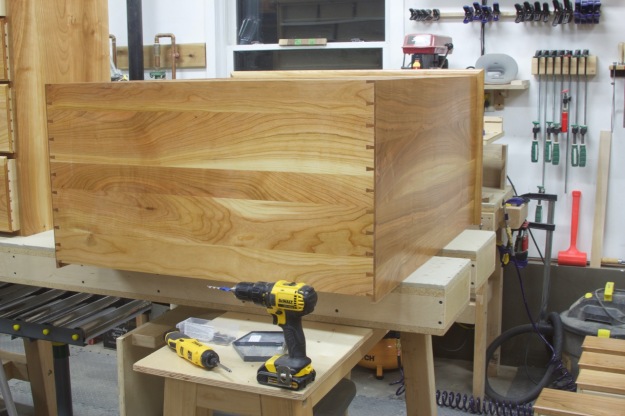
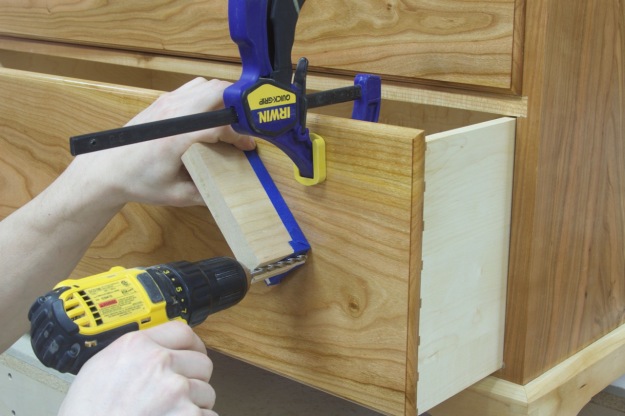
An important element for the durability of the case is seen here. The front tenon on the drawer guide is glued in to the front drawer divider. The slides rests in the dados cut in the case and supports the weight of the drawers. The back of the slide then sits loosely in the rear divider with a 3/16″ gap (the drawer slide is 3/16″ too short). That gap is there to allow for the sides of the case to shorten and lengthen in width through the seasons. That gap (where the electric screwdriver is pointing) will close and open depending on the moisture content of the wood through the seasons.
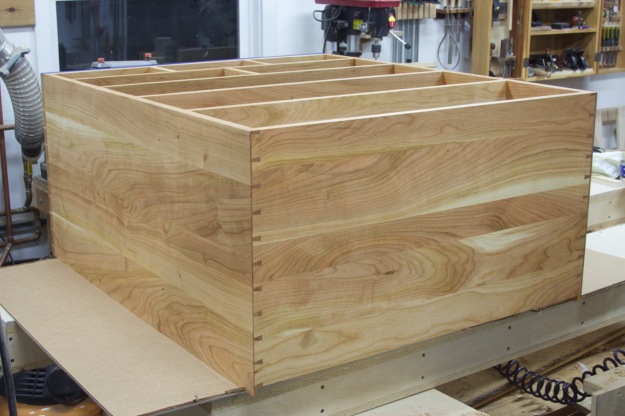
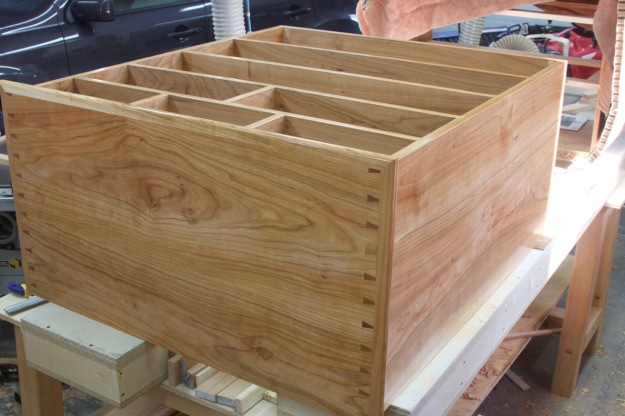
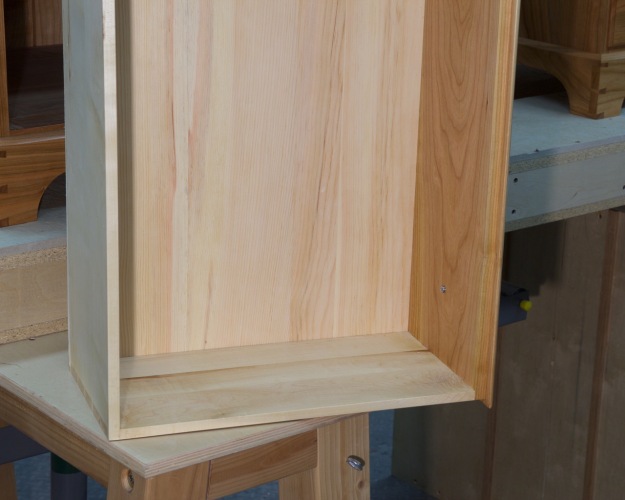
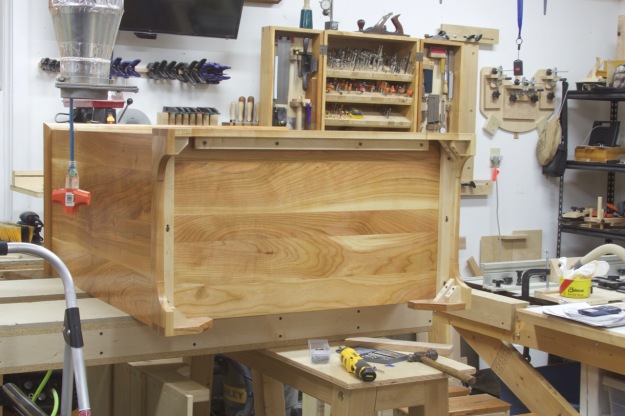
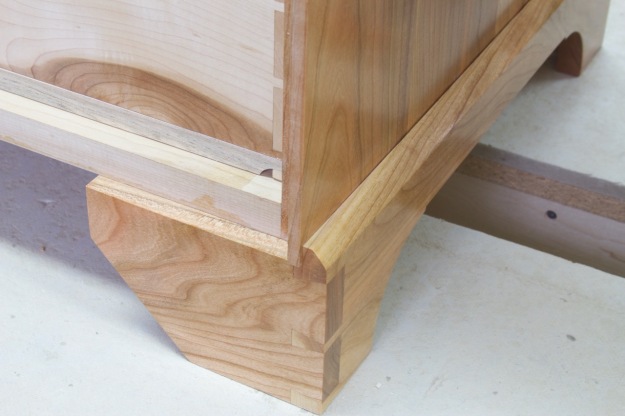
This is the bottom of the case. The internal structure is complete and I cleaned up the dividers with a finely set hand plane, cabinet scraper, and sand paper. I probably spent about an hour just breaking all the sharp edges on the case. Take a good look at the dovetails on the bottom of the case, once the chest of drawers is fully assembled they will be hidden.
The trim was one of my favorite parts. I had taped off the front when I applied finish and glued the trim on directly to the bare wood that had been covered with painters tape. Long grain orientation meant I didn’t need to worry about expansion and contraction. On the sides however, the top of the case was perpendicular to the trim grain orientation. Step one was to align the track. I started with a single long piece and drilled all of the screw holes. Then on the crosscut sled I trimmed it into five separate pieces. The trim was then slid over the track and glued to only the first piece of track and to the miter of the front trim piece. The rest of the track was waxed to allow for movement. As mentioned above – earlier in the build I used a straight edge and shoulder plane to create a perfectly flat top edge so there would be no gaps between the case top and the trim (and stayed clear when using the belt sander).
Nothing like perfectly aligned trim and a silky smooth finish. The dovetails are clean and tight as well.
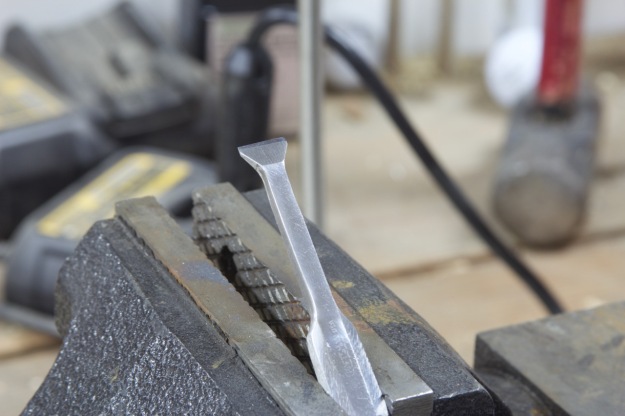
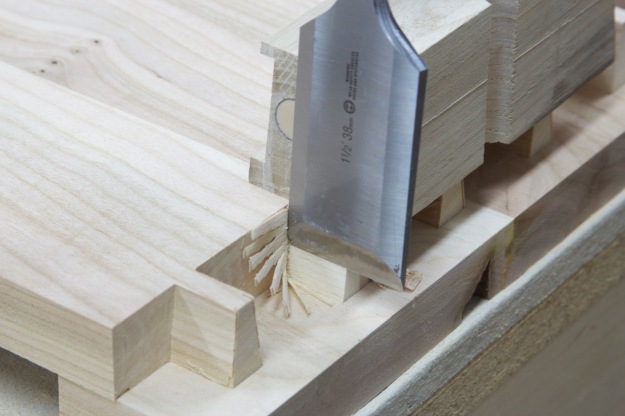
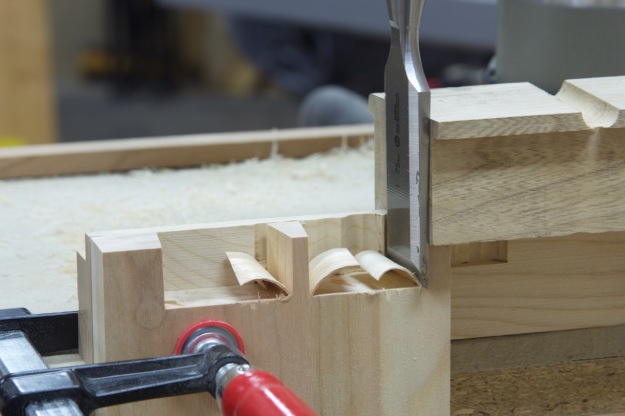
It was time to begin making drawers. For the task of cutting half blind dovetails I found a chisel from my Grandpa Nicholas’s old tool box and put it in to service. Using a Dremel I carved it in to a shop-made fish tail chisel and sharpened it. It took an edge well and excelled at it’s new role.

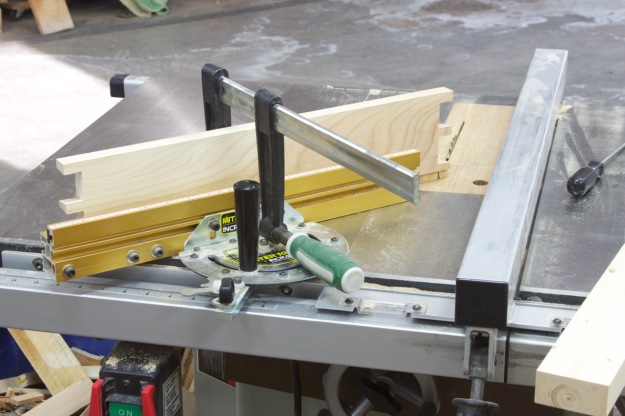
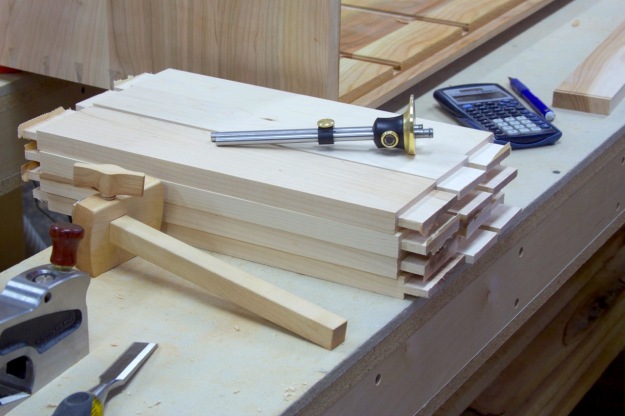
When I build drawers I begin with the sides. Using the saw blade angled at a 1:6 angle I used a miter gauge and stop block to batch out the sides. The blue tape on the board is there as a reference and makes sure I’m working on the correct part of the board. A goof at this point means I need to mill a new board and start over. Luckily, or perhaps due to experience, no boards were lost for the entirety of the project from a mis-cut tail board (that’s 32 tail boards!).

Then I cleaned up the tails with chisels. I used a 1/4″ chisel to hog away the waste and then clamped the board and carefully used a bevel edge 1/4″ chisel (brown handles) to pare clean corners at the base of each tail. Other tools pictures are my 6″ rule, mechanical pencil, and dividers – all used on each drawer for layout.
Midway through the project I picked up a Veritas Dovetail Saw Guide System from Lee Valley Tools. It was a game changer! After a little while I had learned how to use the guide to precisely cut through and half blind dovetails. Most of the time I didn’t have to pare any material away because the saw guide was so precise.
Early on I used a small sliding T-square to check my work. The fishtail chisel was a star for getting into tight corners and cleaning up my half-blind dovetails. It sliced through end grain cherry with remarkable efficiency. After a few drawers I no longer needed the T-square; but it was very helpful for checking my work as I built up my skills.
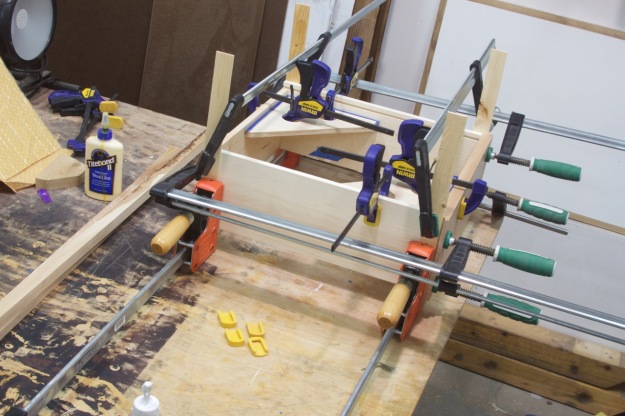
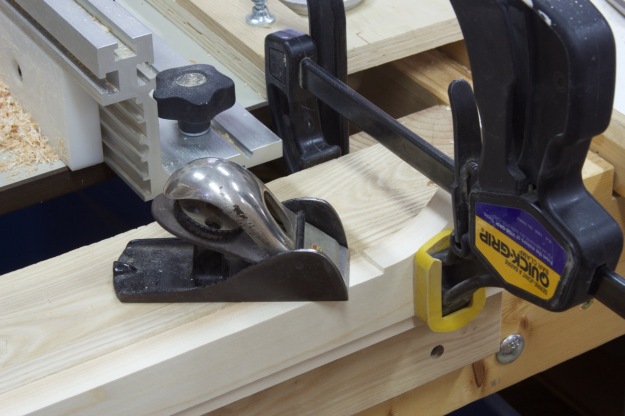
When gluing up the drawers, parallel clamps (orange) were a favorite of mine. Also handy were some shop-made corner squares that I used with my quick-clamps (blue). The F-clamps (green) weren’t necessary, but I used them to guarantee a tightly closed dovetail. Again, Gorilla glue was my glue of choice for dovetails.
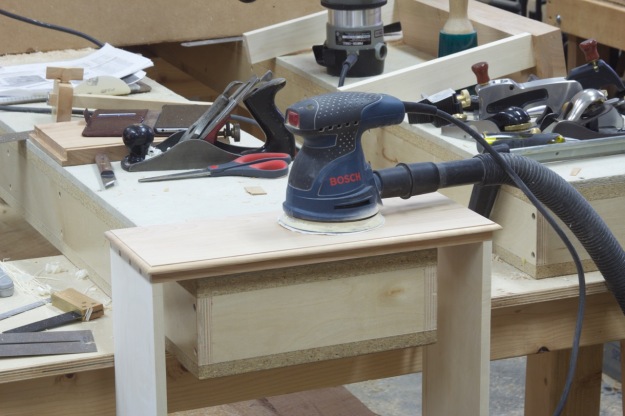
Cleaning up the drawers after glue up took a while. Again, my large shoulder plane was the star. One handy feature of my beam and base workbench was how easily it accommodated the drawers for sanding and planing. After sanding to 180 grit I routed the 1/4″ quarter round on the drawer front and then sanded to 320 grit. A coat of finish (except for the bottom edge of the drawers) and it was on to the next drawer. I left some wood bare because it will better except paste wax than finished wood. The wax will lubricate and provide years of smooth opening and closing.
As I built drawers I built drawer bottoms. I needed a lot of pine. I even salvaged some small pieces from a pallet I had been holding on to out of laziness. Finding usable pine for two small drawers was motivation to finally break down the pallet. The rest of the pallet served as fuel for the wood burner. Pine was dimensioned to 3/4″ and then allowed to dry a few more days before milling to 1/2″ thickness. I added my glue joint to the edges of the boards on router table to facilitate a trouble-free glue up of the bottoms. About 20 minutes of sanding on each with a belt sander with 180 grit left a nice smooth drawer bottom. The half inch bottom needed to fit in to a 1/4″ dado in the drawer sides, so there was one more trip to the router table involved before being mated to a finished drawer. It was a bunch of extra work but I love the look (and smell) of solid pine bottoms. The bottoms are left bare without any finish applied.
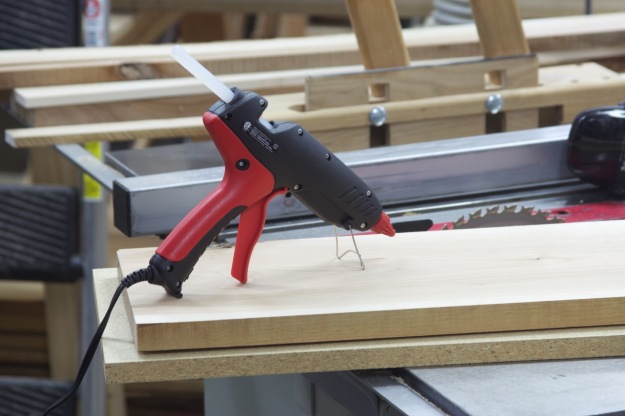
The drawer fronts got bigger… I had lumber up to 13″ wide of 5/4 cherry. My jointer only reaches 6 inches and planer 12.5″ width. To flatten such a larger board I picked a piece of MDF from the cut-off / bargain bin at a big-box store and hot glued the cherry to it. With one side flat I could pry the glue off and plane the opposing side. This technique worked flawlessly.
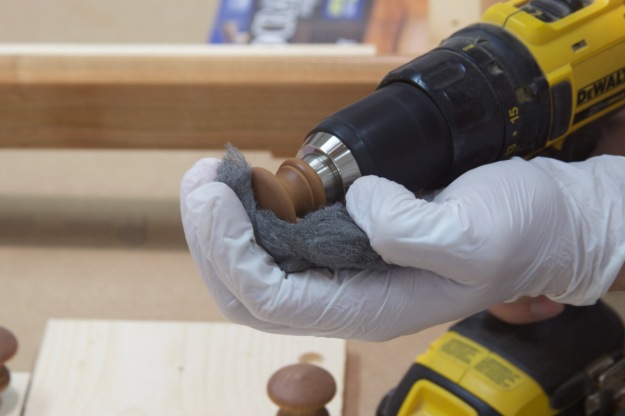
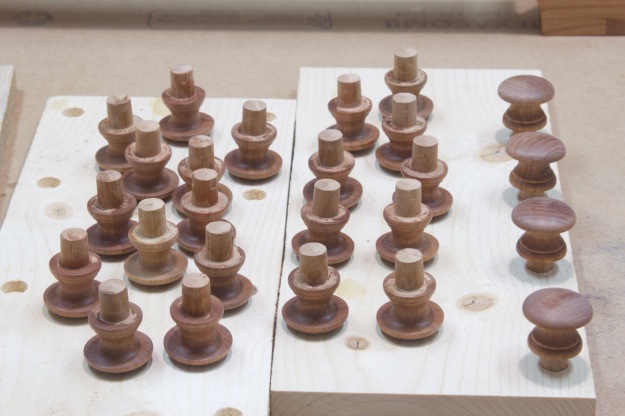
Pre-Finishing the knobs allowed me to polish them up nicely and select for color and character prior to installation.
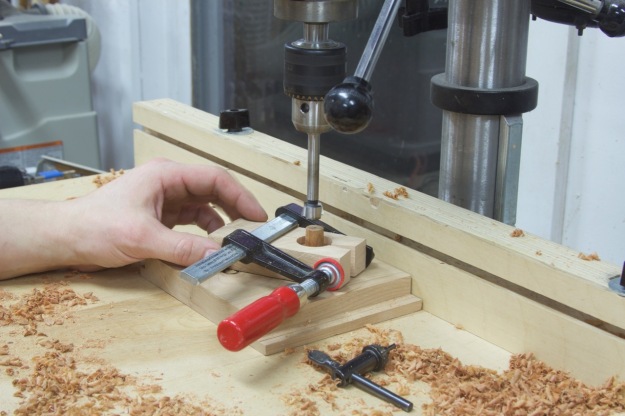
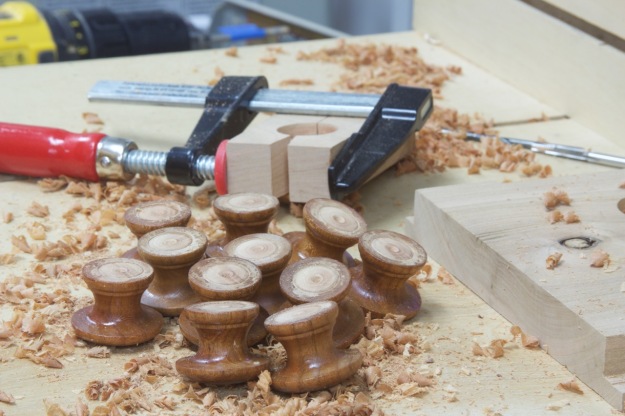
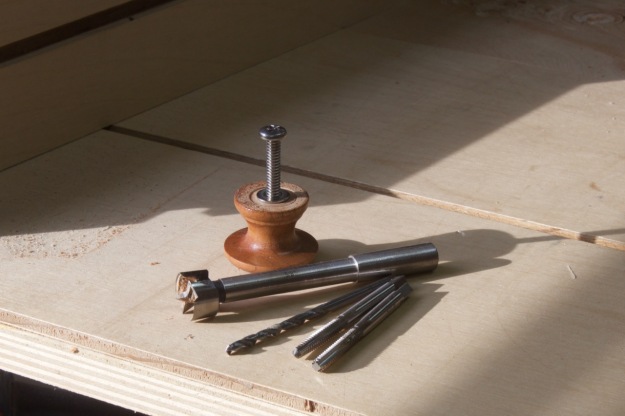
I chose to cut off the tenon of each knob and instead attach it with a screw. The process began by camping the knobs in a shop-made holder and trimming off the tenon. Then I drilled and tapped the knobs. Two taps were needed. a standard #10-24 tap started cutting threads and then a bottom threading tap finished the job. It took a light touch and some practice with a cordless drill to get the feel for it. I stripped the threads on the first two knobs. My first failure taught me I couldn’t hand thread; I had to use a power drill. My second failure taught me that the tap had to thread in and then back out several times during the process for chip clearing and clean results. Correctly done it is very difficult to over tighten and strip the threaded wood. The knobs are attached with authority using a #10-24 stainless steel machine screw 1.5″ long and a stainless steel washer. If I get in to turning and want to make my own knobs this makes it easy to swap out these mass production knobs.
One last look at those gorgeous half-blind dovetails. Even though they weren’t cut with the precision of the top dovetails they still look so good.
And now the dovetail are hidden forever…
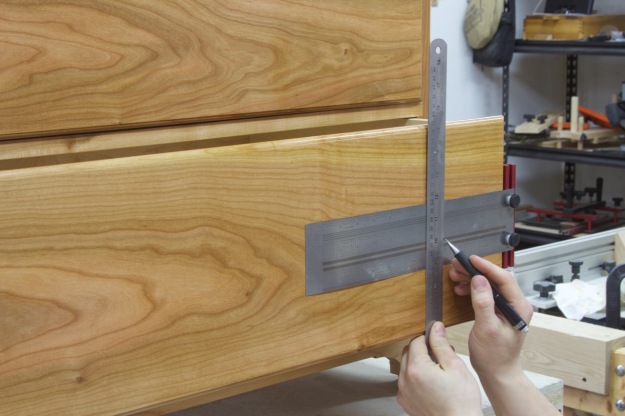
To install the knobs I marked the position of my hole with a ruler attached to an edge guided rule with double sided tape. Then I found the center of the ruler and made a light mark.
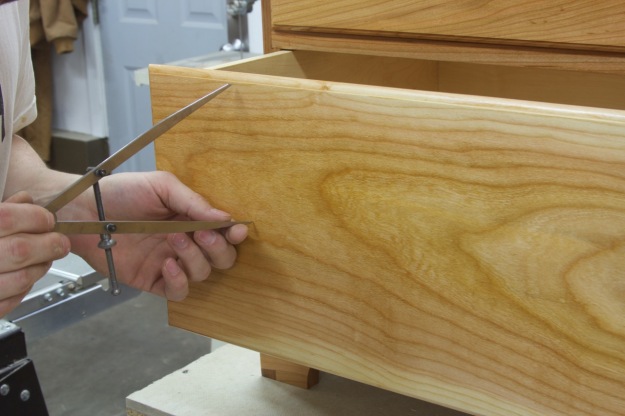
I checked for center using a large divider. This was only a way to double check the position. It caught an error on one drawer where I was off my 3/8″.
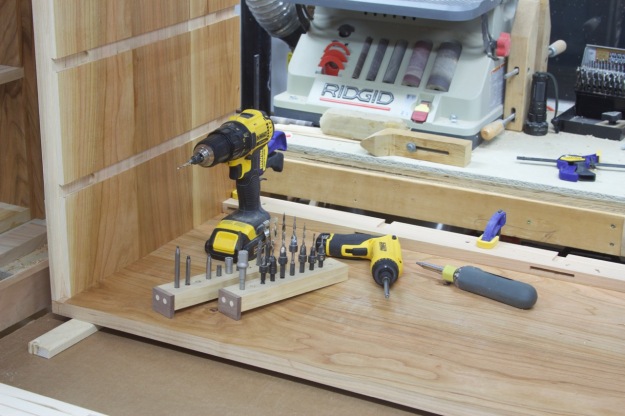
I clamped a block to the inside of the drawer to prevent tear out and then used a shop-built drill guide to align my brad-point bit. The guide is a simple scrap piece with a rabbit. The wood sits flat on the drawer face and the drill bit is guided at a perfect 90° to the work surface. I used blue tap on the guide to prevent scratching on my newly finished drawers faces.
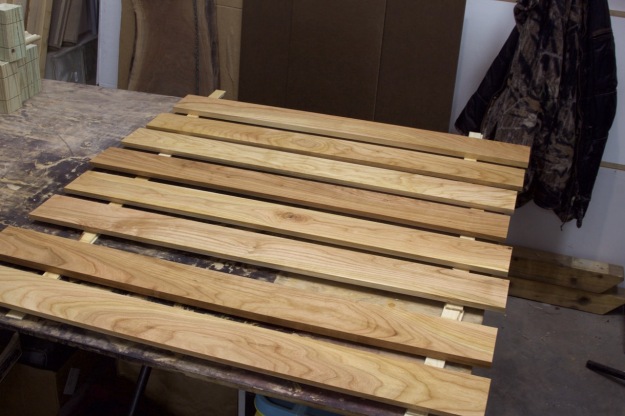
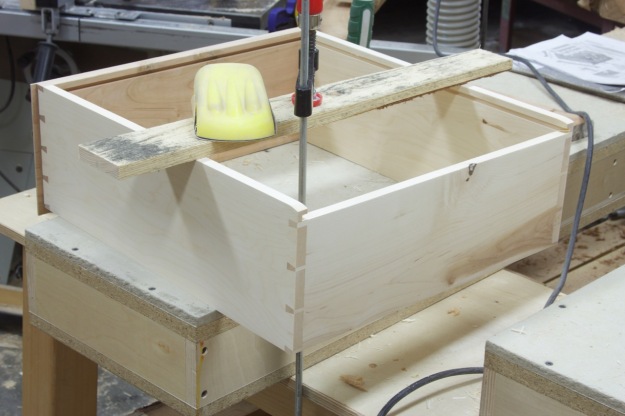
One last look at the back before I cover it up. You can see how I routed the drawer bottom to fit the 1/4″ groove. I like this type of route because it slightly wedges the bottom in, deterring rattling, and preventing the bottom from moving around in the drawer.
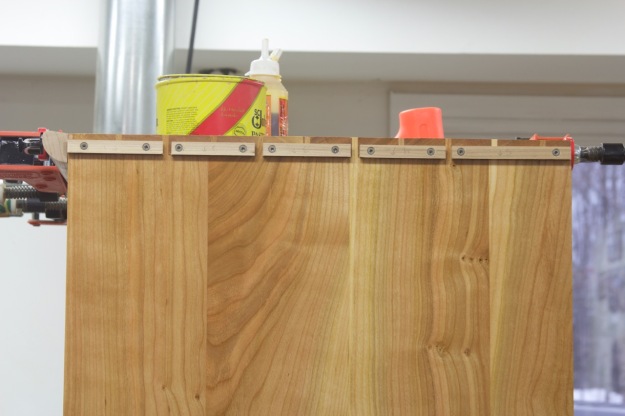
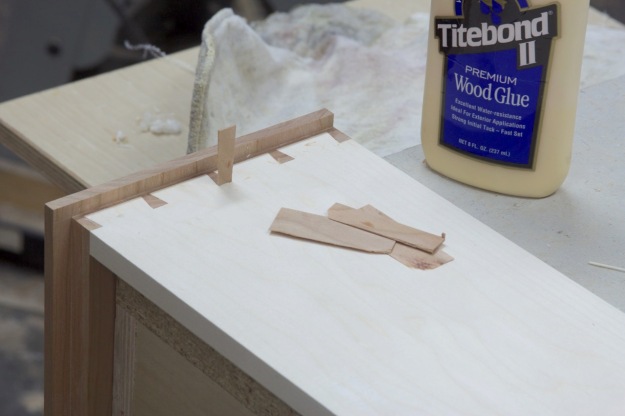
When attaching the back boards I used wedges to space the boards at the correct position to allow for seasonal expansing and shrinking. Once the boards were screwed in place the wedges were removed.
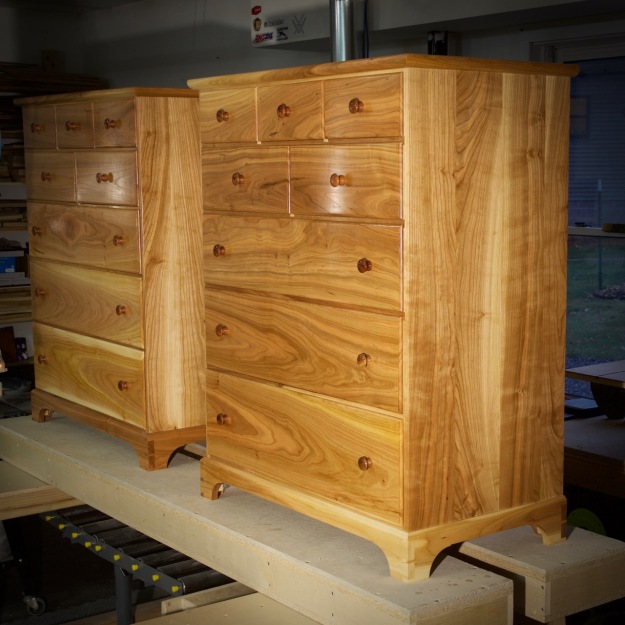
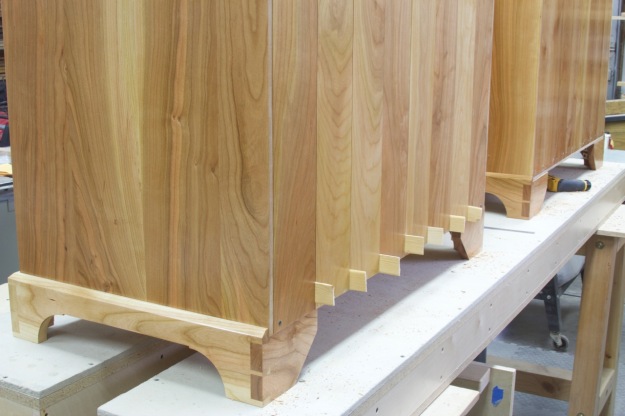
And that’s it. Two Shaker inspired Cherry Chest of Drawers.


Some of my building notes for each Chest of Drawers:
- 134 full dovetails and 20 half dovetails
- 123 pieces (one large panel or one knob = 1 part)
- 30 mortices and 30 tenons
- 8 dados
- 14 sliding dovetails
- 2 trim pieces attached with 10 segments of dovetailed track
- 72 (approx.) glue joints used for panel construction
Drawers:
- 2.5 hours to build bottom from pine rough sawn
- 3 hours to prepare stock for sides
- 5 hours to cut tables and pins
- 2 hours to sand, fit, and tune up dovetails
- 1.5 hours to finish
Base:
- 2 hours to prepare stock
- 5 hours joinery
- 3 hours to shape and route
- 1 hour to sand
- 2 hours to install blue blocks
- 2 hours to finish
Back boards:
- 3 hours to prepare stock
- 2.5 hours to sand and half lap
- 2.5 hours to finish
The case:
- 12 hours to prepare the sides from rough sawn
- 5 hours to cut the tails
- 10 hours to cut the pins
- 2 hours to cut dados
- 2 hours to cut sliding dovetails
Internal frame:
- 5 hours to prepare form rough sawn
- 4 hours to cut matting dovetails
- 3 hours to cut mortises
- 8 hours to cut tenons
- 4 hours to glue assemble
- 2 hours to fine tune
Carcass:
- 6 hours to flatten with hand plane
- 4 hours to sand
- 4 hours to build trim
- 3 hours to fit trim
- 4 hours to finish
Assembly:
- 4 hours to prepare/finish/install Shaker knobs
- 2 hours to install back boards
- 1 hours to install base
- 2 hours miscellaneous activities
Other:
- 10 hours to clean shop
- 5 hours to photograph
- 10 hours to sharpen and set up new tools
** all times are estimates and total about 225 hours per chest. Research and practice joinery easily puts the project passed 500 hours for both chests.
A few other smaller projects finished this Winter:


Amazing!
Beautiful! Nice Job!